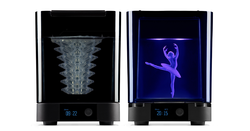
Formlabs Wash and Cure
The automated wash and cure process helps to unlock the parts peak mechanical properties and performance. [1]
Documentation
Training
Form Wash Specifics
The Form Wash uses isopropyl alcohol (IPA) to remove resin. It's used to clean parts and the occasional build plate. Tools should be washed by hand using the alcohol squirt bottles.
Washing Basics:
- Each wash should be run an average of 10 minutes
- This time can be changed based off of the size/structural density of the part, with larger or more complicated parts requiring longer to wash
- Do not remove supports for the washing process
- After washing, remove the print to let it air dry before running it through the Form Cure
- Each resin has its own recommended setting for washing
Changing the Form Wash alcohol
Over time, the IPA in the Form Wash becomes contaminated with resin washed off prints. Once it reaches a contamination threshold, the resin must be changed.
To check the resin level:
- Grab the hydrometer (resembles a small white buoy with a red ring around the central shaft) out of the compartment in the back of the Form Wash
- Place the hydrometer in the alcohol tank
- When the tank is full of pure IPA, the red ring should float level with the surface of the alcohol
- As resin enters the alcohol, the red ring will rise above the surface of the tank
- The alcohol needs to be changed once the red ring has risen to level with the two white tabs on top of the hydrometer's float ring
To change the alcohol:
- Turn the Form Wash off
- Use the Form Wash siphon to pump the contaminated resin into used/empty IPA bottles
- IPA refills are stored in the flammable cabinet in the machine shop
- Pour pure IPA into the Form Wash tank until the level has risen in between the level markings located on the outside of the Form Wash, near the top
- The level marking resembles a zig-zag line with two triangles denoting the high and low acceptable levels
Form Cure Specifics
Curing enables prints to reach their optimal material properties. This means that the strength and stability of each print will be maximized. The Form Cure uses heat and 405 nm light to cure the print, this light is the same wavelength as the laser that the Form 2 has. Using the Form Cure to cure the print is the final step of the printing process.
Curing Basics:
- Before placing the print in the Cure, the print needs to be completely dry after having exited the Wash
- Once the print is dry, it may placed inside of the Cure
- To do this, lift the lid, place the print on circular silver grate, and close the lid once finished
- The knob next to the screen can be used to scroll and click
- Choose the appropriate time and temperature for the resin of the print
- Times and temperatures vary with each resin
- Bulky or thick parts will require more cure time than small or thin parts
- Over-curing is always better than under-curing
- Supports can be most easily removed after the Cure has finished
The recommended setting can be found at Form Cure Time and Temperature Settings towards the bottom of the page under Form Cure Settings. Make sure the correct Material and Version are chosen so that the proper graph and settings are displayed for your print.
