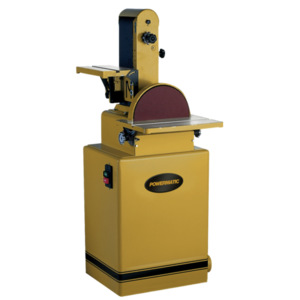
Belt/Disc Sander
Make: PowerMatic
Model: BD31A
Ace: Needed (Makerhub@georgefox.edu).
Location: Wood Shop
Description
The disc sander allows you to quickly remove material on outside corners and flat surfaces. The belt sander allows you to remove material on large inside corners and flat surfaces.
Here is an example of this piece of equipment being used.
Documentation
Terminology
Insert terminology here
Training
Overview
The disc sander allows you to sand outside corners and flat surfaces using an abrasive disc. The belt can perform inside corner and flat surface sanding. The table angles can be adjusted to change the angle of cuts. The sanding table can be set between 15 and 45 degrees. The belt arm can be adjusted between 0 and 90 degrees. It is important to inspect the sanding disc and belt for wear before use. If you notice any holes or cuts in a belt let the supervisor know before trying to power the machine. Tears can be caused by leaving material in the same spot too long. Try to keep work moving across the belt/disc to prevent damage. The disc normally won't tear but it will turn dark and have burn marks.
Demonstration
You will need to demonstrate the safe setup and use of the belt/disc sander. You will be sketching an arc onto a piece of scrap material and sanding up to the line using the disc and belt. Make sure to keep the material moving to prevent burning and tearing of the sanding belt/disc.
General Procedure
1. Obtain a piece of scrap wood. If the work piece is too small it will be difficult to hold onto and create a dangerous situation by placing your fingers too close to the belt/disc.
2. Using a pencil or pen sketch a radius or line onto the edge of your material.
3. Make sure the belt and disc are in good shape and secure.
4. Connect the dust collector hose to the sander.
5. Power on the dust collector and sander.
6. Place the material onto the table and slowly feed your material into the belt/disc. Make sure your hands/fingers are clear of any moving parts.
7. Keep the material moving to prevent too much heat in one spot.
8. Keep sanding until you cut the material back to your line.
9. When you are finished sanding power down the dust collector and sander.
10. Make sure all motion has stopped before cleaning the machine.
11. Reset the space.
Safety
- Sanding creates heat due to the friction. keep material moving to prevent damage to the sanding belt/disc.
- Never put your hand in a position that slipping could cause you to make contact with the belt or disc.
- Never reach over the machine.
- Use a brush when clearing sawdust from the tables, not your hands.
- Use light pressure when removing material. Never try to force feed the machine.
- Avoid kickbacks by sanding on the correct side of the disc. Always sand on the downward side of the disc, which is just left of center on a disc rotating counterclockwise. Sanding on the wrong side is dangerous and can pull material out of your hands.
Certification
Troubleshooting
If belts have hole or tears they need to be replaced. Burnt discs need to be replaced.
Maintenance
General maintenance
The following items need to be periodically lubricated:
- Idler slide (use non hardening grease)
- Table trunnion (use non hardening grease)
Specific Maintenance Tasks
| Maintenance Procedure | Frequency | Done By |
|---|---|---|
| Replace sanding Belt/Pad | As Needed | Ace/Tech |

