Difference between revisions of "PCB Lab"
Jump to navigation
Jump to search
Jwhipple15 (talk | contribs) |
Jwhipple15 (talk | contribs) |
||
| Line 1: | Line 1: | ||
The Printed Circuit Board lab will contain an electronics station (as in the Hub) with the Metcal soldering station and microscope. It will also contain a Voltera V-One PCB Printer (which can print Gerber files onto a board, and can also print solder paste onto normally fabricated boards), a manual pick-and-place machine, and a reflow oven. | The Printed Circuit Board lab will contain an electronics station (as in the Hub) with the Metcal soldering station and microscope. It will also contain a Voltera V-One PCB Printer (which can print Gerber files onto a board, and can also print solder paste onto normally fabricated boards), a manual pick-and-place machine, and a reflow oven. | ||
| + | |||
| + | https://docs.google.com/spreadsheets/d/1M91j-_Qfp9NXlvt4ZF8QRQ2Hq3x50QioqZylHDnSZmc/edit?usp=sharing | ||
The current aces of this area is Nick Stahl (nstahl14@georgefox.edu) and Jake Whipple (jwhipple15@georgefox.edu) | The current aces of this area is Nick Stahl (nstahl14@georgefox.edu) and Jake Whipple (jwhipple15@georgefox.edu) | ||
Revision as of 13:43, 12 February 2019
The Printed Circuit Board lab will contain an electronics station (as in the Hub) with the Metcal soldering station and microscope. It will also contain a Voltera V-One PCB Printer (which can print Gerber files onto a board, and can also print solder paste onto normally fabricated boards), a manual pick-and-place machine, and a reflow oven.
https://docs.google.com/spreadsheets/d/1M91j-_Qfp9NXlvt4ZF8QRQ2Hq3x50QioqZylHDnSZmc/edit?usp=sharing
The current aces of this area is Nick Stahl (nstahl14@georgefox.edu) and Jake Whipple (jwhipple15@georgefox.edu)
Equipment
Equipment by Icon
Organization
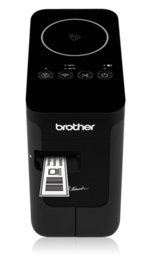
The PCB Lab has a Brother PT-Touch P750W Brother PT-Touch P750W label maker for labeling items. To use it:
- Download the iOS App or the Android App.
- Ensure the label maker is powered on.
- Within the app, select the gear to open settings.
- Select "Printer."
- Select "Set Manually."
- Enter the IP Address of "10.90.12.19" without the quotes.
- Select "Connect."
- Select "Check Media." This will get the correct size of the tape that is currently in the label maker. You should click this button often, especially when you change the tape in the label maker or start a new session of label printing.
- Select "Done" at the top right.
You can now print labels for labeling things in the PCB Lab.

