Difference between revisions of "Soldering Irons"
(Created page with "This is the soldering iron page") |
|||
| (234 intermediate revisions by 8 users not shown) | |||
| Line 1: | Line 1: | ||
| − | This is the soldering iron | + | {{#set: |
| + | |Is equipment=True | ||
| + | |Is located in facility=PCB Lab | ||
| + | |Is located in facility=The Hub | ||
| + | |Is used in domain=Electronics | ||
| + | |Has name={{PAGENAME}} | ||
| + | |Has make=Weller | ||
| + | |Has model=WES51 | ||
| + | |Has serial number= | ||
| + | |Has life expectancy= | ||
| + | |Has year of manufacture or purchase= | ||
| + | |Has replacement cost= | ||
| + | |Has function=Soldering Iron | ||
| + | |Has icon=File:soldering_icon.png | ||
| + | |Has icondesc=Soldering Iron | ||
| + | |Has image=File:soldering.jpg | ||
| + | |Has imagedesc=Soldering a component | ||
| + | |Has description=Soldering is a process in which two or more items (usually metal) are joined together by melting and putting a filler metal (solder) into the joint | ||
| + | |Has certification=https://georgefox.instructure.com/courses/1242 | ||
| + | |Has group=Circuit Board Design | ||
| + | |Has ace=Karson Rhoads;krhoads20@georgefox.edu | ||
| + | }} | ||
| + | [[{{#show: {{FULLPAGENAME}}|?Has icon|link=none}}|140px|left|top|{{#show: {{FULLPAGENAME}}|?Has icondesc}}]] | ||
| + | [[{{#show: {{FULLPAGENAME}}|?Has image|link=none}}|thumb|upright=1.5|{{#show: {{FULLPAGENAME}}|?Has imagedesc}}]] | ||
| + | |||
| + | Make: {{#show: {{PAGENAME}} |?Has make}} | ||
| + | |||
| + | Model: {{#show: {{PAGENAME}} |?Has model}} | ||
| + | |||
| + | Ace: {{#show: {{PAGENAME}} |?Has ace.Has name}} ({{#show: {{PAGENAME}} |?Has ace.Has email address}}). | ||
| + | |||
| + | Location: {{#show: {{PAGENAME}} |?Is located in facility}} | ||
| + | |||
| + | |||
| + | |||
| + | |||
| + | __TOC__ | ||
| + | |||
| + | ==Description== | ||
| + | |||
| + | '''Soldering''' is a process in which two or more items (usually metal) are joined together by melting and putting a filler metal (solder) into the joint, the filler metal having a lower melting point than the adjoining metal. Soldering differs from welding in that soldering does not involve melting the work pieces. In brazing, the filler metal melts at a higher temperature, but the work piece metal does not melt. In the past, nearly all solders contained lead, but environmental and health concerns have increasingly dictated use of lead-free solder for electronics and plumbing purposes. | ||
| + | |||
| + | Here is an example of this piece of equipment being used. | ||
| + | |||
| + | Insert video media here. | ||
| + | |||
| + | ==Documentation== | ||
| + | |||
| + | ====Terminology==== | ||
| + | <gallery> | ||
| + | File:SolderingTips.jpg|Soldering Tip | ||
| + | File:Solder.jpg|Solder | ||
| + | File:Flux.jpg|Flux | ||
| + | </gallery> | ||
| + | |||
| + | [[Media:WES51_OI_PL.pdf|Soldering Iron User Manual]] | ||
| + | |||
| + | ==Training== | ||
| + | ====Operation==== | ||
| + | |||
| + | The Soldering Iron is an amazing tool that allows us to construct circuits with sturdy connections between components. The detailed steps to do this can be found in videos on the Description section. | ||
| + | |||
| + | ====Demonstration==== | ||
| + | |||
| + | Before using a Soldering Station, students will need to read some documentation, watch some videos, and pass a quiz on Canvas. Upon completion, students will be given the following PCB and components to assemble the circuit below. Upon completion, they will have the PCB Lab volunteers assess their work and confirm operation. The deliverable will include a video of the working device and a crisp "Thumbs Up" from the PCB Lab Volunteer to assure that the student successfully completed the task. | ||
| + | |||
| + | <gallery> | ||
| + | File:blinkypcb.jpg|[[Media:Blinky.zip|PCB]] | ||
| + | File:ne555.png|[https://www.digikey.com/product-detail/en/texas-instruments/NE555P/296-1411-5-ND/277057 555 timer] | ||
| + | File:res1k.jpg|[https://www.digikey.com/product-detail/en/stackpole-electronics-inc/CF14JT1K00/CF14JT1K00CT-ND/1830350 1 K<span title="&Omega;">Ω</span> resistor] | ||
| + | File:res470k.jpg|[https://www.digikey.com/product-detail/en/stackpole-electronics-inc/CF14JT470K/CF14JT470KCT-ND/1830415 470 K<span title="&Omega;">Ω</span> resistor] | ||
| + | File:cap1uF.jpg|[https://www.digikey.com/product-detail/en/UVP1H010MDD1TD/493-12697-1-ND/4328314?utm_campaign=buynow&WT.z_cid=ref_octopart_dkc_buynow&utm_medium=aggregator&curr=usd&site=us&utm_source=octopart 1 <span title="&mu;">μ</span>F capacitor] | ||
| + | File:red_led.jpg|[https://www.digikey.com/product-detail/en/lite-on-inc/LTL-4223/160-1127-ND/200395 red LED] | ||
| + | File:battcon.jpg|[https://www.xump.com/science/9V-Battery-Snap-Connector-Leads.cfm?SID=12&gclid=EAIaIQobChMI04mUoZaF2QIVAm5-Ch0pDgDrEAQYAiABEgKI1_D_BwE 9V Battery connector] | ||
| + | File:Blinking LED Circuit.gif|Completed PCB | ||
| + | </gallery> | ||
| + | |||
| + | [[File:Soldering_course_circuit.jpg|none|thumb|583x583px]] | ||
| + | |||
| + | ====General Procedure==== | ||
| + | # First things first, you need to learn how to use the soldering irons! Soldering is not difficult, but understanding some basic concepts will go a long way toward a successful experience. As part of your training, you will need to read some documentation and watch some videos. | ||
| + | # After scouring the web for examples of soldering training, we really liked the lessons captured in the [https://www.youtube.com/playlist?list=PL926EC0F1F93C1837 PACE] series, despite the fact that they were filmed in the 80's. These videos are well produced (for something possibly older than your parents) and have a lot of good information. The quizzable information is in the very first, fifth, and sixth videos, but the other videos have great examples of good and bad soldering joints. Another more modern video from [https://www.youtube.com/watch?v=ZwU9SqO0udU Beauty and the Bolt] is also insightful. This video is a little more modern, and a good resource, but not as technically interesting. It talks a bit about desoldering as well as soldering wires together and how to use heat shrink and electrical tape. A more modern series is available from [https://www.howcast.com/guides/930-how-to-solder Howcast]. It wouldn't hurt at all to watch this series, but we will just focus on a couple for the quiz. Finally, there is an official training video from the [[Maker Hub]] that is tailored to our specific space and equipment. This video will give you the information you need to perform the live solder demonstration required for your soldering certification. | ||
| + | # This nostalgic set of [https://www.youtube.com/playlist?list=PL926EC0F1F93C1837 videos] from PACE are quite old, but surprisingly still quite relevant. The style makes you think that you will be getting ready to watch an old Disney cartoon - you aren't. Don't get disappointed. | ||
| + | # '''Basic Soldering Lesson 1:''' This is by far the longest of the videos at (20:44), but also packed with the most pertinent information. It provides great background on solder, flux, wetting, and then mechanics of the iron and the joint. We do not have the student handbook that is mentioned. We suspect that you can manage without that. Here are some key ideas that you should watch for: | ||
| + | ## What is solder? What temperatures do the different solders melt at? | ||
| + | ## What is flux? | ||
| + | ## What is wetting? | ||
| + | ## What are the different aspects of a soldering iron?{{#evu:https://www.youtube.com/watch?v=vIT4ra6Mo0s}} | ||
| + | # '''Basic Soldering Lesson 2-5:''' These videos are worth watching, but they are not essential for this training. | ||
| + | ## [https://www.youtube.com/watch?v=Mrhg5A1a1mU&index=2&list=PL926EC0F1F93C1837&t=0s Basic Soldering Lesson 2] - "Soldering To PCB Terminals" (6:50) | ||
| + | ## [https://www.youtube.com/watch?v=_GLeCt_u3U8&index=3&list=PL926EC0F1F93C1837&t=0s Basic Soldering Lesson 3] - "Cup Terminals" (4:19) | ||
| + | ## [https://www.youtube.com/watch?v=hvTiql-ED4A&index=4&list=PL926EC0F1F93C1837&t=0s Basic Soldering Lesson 4] - "Bifurcated Terminals" (2:45) | ||
| + | ## [https://www.youtube.com/watch?v=sN3V8hMiUb4&index=5&list=PL926EC0F1F93C1837&t=0s Basic Soldering Lesson 5] - "Hook and Pierced Terminals" (1:19) | ||
| + | # '''Basic Soldering Lesson 6:''' Good explanation of a "semi-clenched" method for soldering an axial-lead component. This technique allows the component to be held in place for soldering without any extra tape or glue (or a potentially burnt finger).{{#evu:https://www.youtube.com/watch?v=AY5M-lGxvzo}} | ||
| + | # '''Basic Soldering Lesson 7:''' Applying the "clenching" idea to an IC. Typically, we will not use this technique, but will instead hold the part and "tack" these same leads with solder - just to hold it. The rest of the video has great examples of IC's being soldered.{{#evu:https://www.youtube.com/watch?v=VgcPxdnjwt4}} | ||
| + | # '''Basic Soldering Lesson 8-9:''' We don't normally see too many of these any more, but again, nice examples of good joints that are similar to components we still use. Rather than flatpack or planar components, we generally use "surface-mount" now. But, the soldering part is still useful to watch. The techniques are similar. Our PCB's will generally come "pre-tined" and the component leads are already bent, but the rest of the soldering is the same. | ||
| + | ## [https://www.youtube.com/watch?v=sTv3gK9tAKA&index=8&list=PL926EC0F1F93C1837&t=0s Basic Soldering Lesson 8] - "Integrated Circuits" (1:16) | ||
| + | ## [https://www.youtube.com/watch?v=Nq5ngauITsw&index=9&list=PL926EC0F1F93C1837&t=0s Basic Soldering Lesson 9] - "Integrated Circuits: The Flatpack & Other Planar-mounted Components" (6:20) | ||
| + | # '''Howcast How to Solder:''' This set of [https://www.howcast.com/guides/930-how-to-solder videos] from Howcast is worth watching, but we will only highlight a couple of them here that talk about removing solder. | ||
| + | # '''How to Remove Solder'''{{#evu:https://www.youtube.com/watch?v=-lnRf2biz50}} | ||
| + | # '''How to Remove Through-Hole Components'''{{#evu:https://www.youtube.com/watch?v=zjQf0ajBYmM}} | ||
| + | # '''Maker Hub Video:''' This video contains specific information for soldering in the Maker Hub as well as a basic overview of what will be expected in your live demonstration.{{#evu:https://www.youtube.com/watch?v=4v98_f7JFdo}} | ||
| + | # | ||
| + | # Acquire a soldering station. For this procedure, this particular station will be referenced, the Weller WES51.[[File:...solderingiron.png|none|thumb|300x300px]] | ||
| + | # You can power it on using the switch on the left and control the temperature in °F using the temperature knob on the right. 650-750 °F is a good temperature range to keep it at. When the light is solid green, the iron is not heated up yet. When it is heated to the temperature you set on the temperature knob, it will start blinking green. | ||
| + | # Before you begin using the soldering iron, wet the sponge! Take it to a sink and drench that boi. This is used to clean the soldering iron continually during use. If you don't make it wet, it will burn up the sponge and smell/look gross, and it won't clean the soldering iron. | ||
| + | # Now you're ready to use the soldering iron! Refer to the videos in times of doubt. | ||
| + | # Don't forget to complete that video checking off your board! | ||
| + | |||
| + | ==Safety== | ||
| + | # Always wear safety glasses when you are cutting wires or anything else at the electronics workstation. If other people are nearby, ask them to wear safety glasses or step away briefly. | ||
| + | # Angle your wire cuts down into the table or cover them with your free hand to block the projectile. | ||
| + | # Soldering irons can get up to 1000 °F. Do not touch the tip of the soldering iron; it is extremely hot. If you get burned, run cold water over the burned area for several minutes to reduce inflammation and the potential for blistering. | ||
| + | # Wires and components can also become extremely hot from soldering. Use the available helping hands, and allow the wires/components to cool before touching. | ||
| + | # Always return the soldering iron to its stand when not in use. Never lay it directly on the workbench. | ||
| + | # Ensure you have adequate ventilation when soldering. Use the available fume extractors. | ||
| + | # Turn off the soldering iron when it is not in use. | ||
| + | # If you start an electrical fire, use a fire extinguisher to put it out. NEVER use water to put out an electrical fire. | ||
| + | # Keep liquids away from the electronics workstation. | ||
| + | |||
| + | ==Certification== | ||
| + | |||
| + | For the soldering irons in <strong>The Hub</strong>, complete <strong>The Hub - {{PAGENAME}} Module</strong> at the link below to gain access to the {{PAGENAME}}. | ||
| + | |||
| + | For the soldering irons in the <strong>PCB Lab</strong>, complete the <strong>PCB Lab - {{PAGENAME}} Module</strong> at the link below to gain access to the {{PAGENAME}}. | ||
| + | |||
| + | The Maker Hub Canvas course pertains to all facilities and equipment contained in the Maker Hub; simply complete the quizzes for the facilities/equipment you wish to use in the Maker Hub. Please email <span style="color:blue">makerhub@georgefox.edu</span> if you have any questions. | ||
| + | |||
| + | [https://georgefox.instructure.com/enroll/GH36RT Maker Hub Canvas Course] | ||
| + | |||
| + | ==Troubleshooting== | ||
| + | There are two things in particular that could keep you from successfully soldering: an untinned tip and a loose tip. If the tip is not shiny silver, then place a little solder on the tip and wipe it on the sponge. Some soldering irons allow there tips to be replaced for the sake of having different shapes. If the iron is not heating up and you are using this type of iron, it is possible that the tip is not inserted into the iron fully. To fix this, grab some pliers (so you don't burn your hands), grip the shaft and push it in fully. After you have finished soldering, you might check the electrical continuity of your solder joint with a [[Electronics Workstation | DVM]]. | ||
| + | |||
| + | ==Maintenance== | ||
| + | ====General maintenance==== | ||
| + | |||
| + | The maintenance for the soldering iron generally consists of keeping the soldering station cleaned, stocked, and the iron tinned. | ||
| + | |||
| + | ====Specific Maintenance Tasks==== | ||
| + | {| class="wikitable" | ||
| + | !Maintenance Procedure | ||
| + | !Frequency | ||
| + | !Done By | ||
| + | |- | ||
| + | |General Cleaning | ||
| + | |After each use | ||
| + | |Student | ||
| + | |- | ||
| + | |Tin Soldering Iron | ||
| + | |As needed | ||
| + | |Student | ||
| + | |- | ||
| + | |Stock solder, solder wick, sponge | ||
| + | |As needed | ||
| + | |Ace | ||
| + | |}__TOC__ | ||
Revision as of 14:08, 22 August 2024
Make: Weller
Model: WES51
Ace: Needed (Makerhub@georgefox.edu).
Description
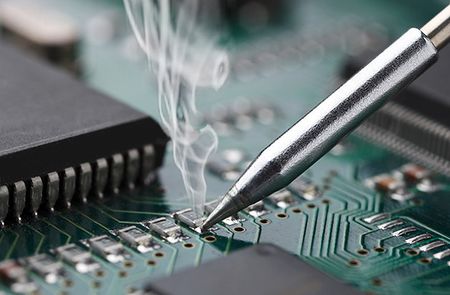
Soldering is a process in which two or more items (usually metal) are joined together by melting and putting a filler metal (solder) into the joint, the filler metal having a lower melting point than the adjoining metal. Soldering differs from welding in that soldering does not involve melting the work pieces. In brazing, the filler metal melts at a higher temperature, but the work piece metal does not melt. In the past, nearly all solders contained lead, but environmental and health concerns have increasingly dictated use of lead-free solder for electronics and plumbing purposes.
Here is an example of this piece of equipment being used.
Insert video media here.
Documentation
Terminology
Training
Operation
The Soldering Iron is an amazing tool that allows us to construct circuits with sturdy connections between components. The detailed steps to do this can be found in videos on the Description section.
Demonstration
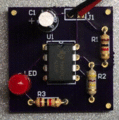
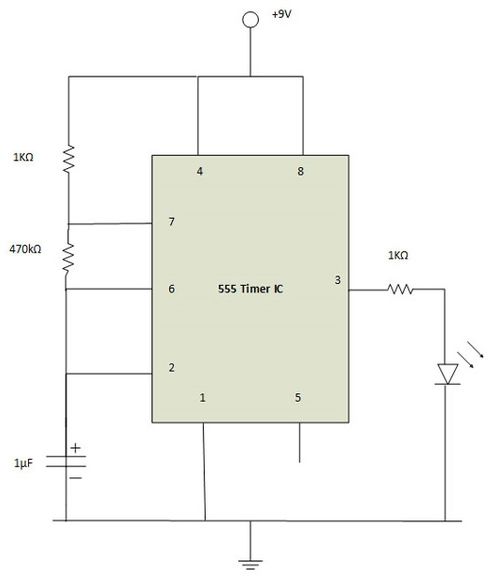
Before using a Soldering Station, students will need to read some documentation, watch some videos, and pass a quiz on Canvas. Upon completion, students will be given the following PCB and components to assemble the circuit below. Upon completion, they will have the PCB Lab volunteers assess their work and confirm operation. The deliverable will include a video of the working device and a crisp "Thumbs Up" from the PCB Lab Volunteer to assure that the student successfully completed the task.
General Procedure
- First things first, you need to learn how to use the soldering irons! Soldering is not difficult, but understanding some basic concepts will go a long way toward a successful experience. As part of your training, you will need to read some documentation and watch some videos.
- After scouring the web for examples of soldering training, we really liked the lessons captured in the PACE series, despite the fact that they were filmed in the 80's. These videos are well produced (for something possibly older than your parents) and have a lot of good information. The quizzable information is in the very first, fifth, and sixth videos, but the other videos have great examples of good and bad soldering joints. Another more modern video from Beauty and the Bolt is also insightful. This video is a little more modern, and a good resource, but not as technically interesting. It talks a bit about desoldering as well as soldering wires together and how to use heat shrink and electrical tape. A more modern series is available from Howcast. It wouldn't hurt at all to watch this series, but we will just focus on a couple for the quiz. Finally, there is an official training video from the Maker Hub that is tailored to our specific space and equipment. This video will give you the information you need to perform the live solder demonstration required for your soldering certification.
- This nostalgic set of videos from PACE are quite old, but surprisingly still quite relevant. The style makes you think that you will be getting ready to watch an old Disney cartoon - you aren't. Don't get disappointed.
- Basic Soldering Lesson 1: This is by far the longest of the videos at (20:44), but also packed with the most pertinent information. It provides great background on solder, flux, wetting, and then mechanics of the iron and the joint. We do not have the student handbook that is mentioned. We suspect that you can manage without that. Here are some key ideas that you should watch for:
- What is solder? What temperatures do the different solders melt at?
- What is flux?
- What is wetting?
- What are the different aspects of a soldering iron?
- Basic Soldering Lesson 2-5: These videos are worth watching, but they are not essential for this training.
- Basic Soldering Lesson 2 - "Soldering To PCB Terminals" (6:50)
- Basic Soldering Lesson 3 - "Cup Terminals" (4:19)
- Basic Soldering Lesson 4 - "Bifurcated Terminals" (2:45)
- Basic Soldering Lesson 5 - "Hook and Pierced Terminals" (1:19)
- Basic Soldering Lesson 6: Good explanation of a "semi-clenched" method for soldering an axial-lead component. This technique allows the component to be held in place for soldering without any extra tape or glue (or a potentially burnt finger).
- Basic Soldering Lesson 7: Applying the "clenching" idea to an IC. Typically, we will not use this technique, but will instead hold the part and "tack" these same leads with solder - just to hold it. The rest of the video has great examples of IC's being soldered.
- Basic Soldering Lesson 8-9: We don't normally see too many of these any more, but again, nice examples of good joints that are similar to components we still use. Rather than flatpack or planar components, we generally use "surface-mount" now. But, the soldering part is still useful to watch. The techniques are similar. Our PCB's will generally come "pre-tined" and the component leads are already bent, but the rest of the soldering is the same.
- Basic Soldering Lesson 8 - "Integrated Circuits" (1:16)
- Basic Soldering Lesson 9 - "Integrated Circuits: The Flatpack & Other Planar-mounted Components" (6:20)
- Howcast How to Solder: This set of videos from Howcast is worth watching, but we will only highlight a couple of them here that talk about removing solder.
- How to Remove Solder
- How to Remove Through-Hole Components
- Maker Hub Video: This video contains specific information for soldering in the Maker Hub as well as a basic overview of what will be expected in your live demonstration.
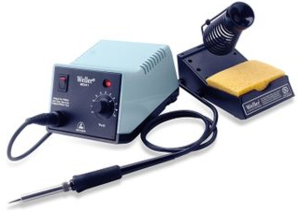
- Acquire a soldering station. For this procedure, this particular station will be referenced, the Weller WES51.
- You can power it on using the switch on the left and control the temperature in °F using the temperature knob on the right. 650-750 °F is a good temperature range to keep it at. When the light is solid green, the iron is not heated up yet. When it is heated to the temperature you set on the temperature knob, it will start blinking green.
- Before you begin using the soldering iron, wet the sponge! Take it to a sink and drench that boi. This is used to clean the soldering iron continually during use. If you don't make it wet, it will burn up the sponge and smell/look gross, and it won't clean the soldering iron.
- Now you're ready to use the soldering iron! Refer to the videos in times of doubt.
- Don't forget to complete that video checking off your board!
Safety
- Always wear safety glasses when you are cutting wires or anything else at the electronics workstation. If other people are nearby, ask them to wear safety glasses or step away briefly.
- Angle your wire cuts down into the table or cover them with your free hand to block the projectile.
- Soldering irons can get up to 1000 °F. Do not touch the tip of the soldering iron; it is extremely hot. If you get burned, run cold water over the burned area for several minutes to reduce inflammation and the potential for blistering.
- Wires and components can also become extremely hot from soldering. Use the available helping hands, and allow the wires/components to cool before touching.
- Always return the soldering iron to its stand when not in use. Never lay it directly on the workbench.
- Ensure you have adequate ventilation when soldering. Use the available fume extractors.
- Turn off the soldering iron when it is not in use.
- If you start an electrical fire, use a fire extinguisher to put it out. NEVER use water to put out an electrical fire.
- Keep liquids away from the electronics workstation.
Certification
For the soldering irons in The Hub, complete The Hub - Soldering Irons Module at the link below to gain access to the Soldering Irons.
For the soldering irons in the PCB Lab, complete the PCB Lab - Soldering Irons Module at the link below to gain access to the Soldering Irons.
The Maker Hub Canvas course pertains to all facilities and equipment contained in the Maker Hub; simply complete the quizzes for the facilities/equipment you wish to use in the Maker Hub. Please email makerhub@georgefox.edu if you have any questions.
Troubleshooting
There are two things in particular that could keep you from successfully soldering: an untinned tip and a loose tip. If the tip is not shiny silver, then place a little solder on the tip and wipe it on the sponge. Some soldering irons allow there tips to be replaced for the sake of having different shapes. If the iron is not heating up and you are using this type of iron, it is possible that the tip is not inserted into the iron fully. To fix this, grab some pliers (so you don't burn your hands), grip the shaft and push it in fully. After you have finished soldering, you might check the electrical continuity of your solder joint with a DVM.
Maintenance
General maintenance
The maintenance for the soldering iron generally consists of keeping the soldering station cleaned, stocked, and the iron tinned.
Specific Maintenance Tasks
| Maintenance Procedure | Frequency | Done By |
|---|---|---|
| General Cleaning | After each use | Student |
| Tin Soldering Iron | As needed | Student |
| Stock solder, solder wick, sponge | As needed | Ace |
