Windchimes
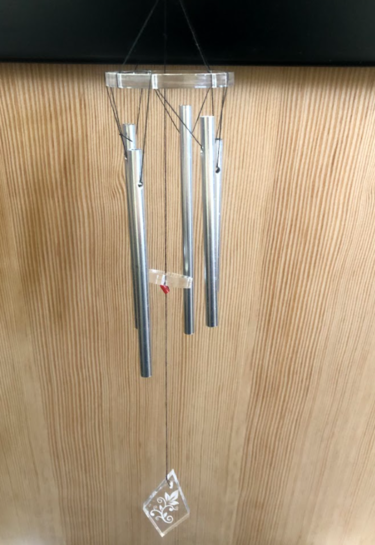
This TV will have you draw the chimes in SolidWorks, cut them in the Laser Cutter, and build your own set of windchimes using acrylic discs and pre-made chimes.
Procedure
Buckle up...
SolidWorks
Step 1: Open SolidWorks 2020, and select a new part. Don't forget to save your file frequently as you go. In the bottom-right corner of your Solidworks window, set the units to IPS (inch, pound, second).
Step 2: Select the Top Plane in the design tree (the left column on your screen) to begin your sketch. Click on the Sketch tab above and click Sketch.
Step 3: We are going to start with the main hanger.
The first circle is going to be centered at the origin. Select the circle command in the sketch pane. Where you select is going to be the center of the circle, so click the origin and build out the circle at any size.
Step 4: Using the Smart dimension tool, make the diameter of the circle 2 in
Offset the circle inwards a distance of 0.15 in
Step 5: Draw a construction line from the quadrant point of the inner circle to the quadrant point of the outer circle.
Draw a small circle centered at the midpoint of the construction line. Set the diameter to 0.05 in
We are going to make a total of four of these circles around the perimeter of the circle using a sketch pattern. These are going to be used to tie the hanging strings to.
Select the small circle, then the drop down arrow next to “Linear Sketch Pattern” in the sketch pane. Select “Circular Sketch Pattern”
In the sidebar, change the number of instances to 4 and click the green check mark. This will make 4 evenly spaced, identical circles around a center point.
Using the same beginning circle, create another circular array with 5 instances
Step 6: We are going to extrude this sketch to make the hanger using contours. While still in the sketch, select the “Extruded Boss/Base” command
The thickness will be the same as your material. In this TV we are using ¼” acrylic.
We want to extrude the outer circle and still have the holes cut out with a hollow center. SolidWorks may be smart and do this for you automatically, but if not, open the “Selected Contours” section in the sidebar and select the area between the two large circles. It should look the this:
Hit the green check mark to create the 3D solid
Step 7: Next we are going to create the center circle that will hit against the chimes. Normal to the top plane and start a new sketch with a circle centered at the origin. This one will be smaller with a diameter of 1 in
This one needs a hole in the center. Create a small circle with a diameter of 0.05 in
Step 8: When we extrude this circle, we want it to be lower than our holder, so we are going to use the “Offset” option.
Select “Extruded Boss/Base and in the sidebar change the “from” option from Sketch Plane to Offset. This offsets the beginning of the extrusion from the sketch plane. Enter an offset distance of 2 in, and an extrusion thickness of 0.25 in.
Step 9: We are going to make the ornamental hanging piece that goes at the bottom. This can be any shape as long as it is about 1 in wide and no more than 2 in tall. I am going to make a teardrop diamond shape for mine.
The first step is to create a sketch in the front plane. Draw a construction line from the origin and down to about 2 inches below the center circle. (This is not specific since it is just for visualization)
Draw your hanging shape at the end of the construction line.
Extrude the piece the same ¼”, but this time change the direction 1 to “Mid-Plane”
After finishing that piece, you have drawn each piece that you will be laser cutting and have a general idea of how it will look when hanging.
Step 10: Since we are going to be cutting these pieces on the laser cutter, we need to export them as .dxf so the laser cutter program can read it.
Go to “File > Save as” and change the type to .dxf We are going to have to do this twice since not all of our faces are parallel. This will prompt you to select what view or faces you want to export. Select the “Faces/loops/edges” option and select the top faces of the two circle hangers.
This will export those faces as 2D vectors that can be put into inkscape and prepared for cutting.
Repeat these steps and select the front face of the hanger.
Inkscape
Next we are going to prepare our .dxf files for the Laser Cutter using Inkscape. This is about what the file should look like. Details for preparing the file and instructions for cutting the pieces can be found on the Laser Cutter wiki page. As a note, all cut lines should be fully red (255,0,0) and all engraving should be fully black (0,0,0)
