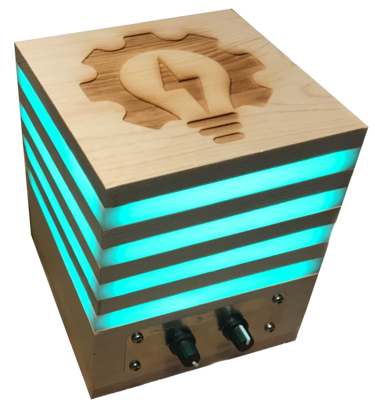
Mood Lamp
In this TV, we will create a mood lamp.
Bill of Materials
Create the wooden "heels" and "slices"
I thought about calling this project the "light loaf" due to the terminology of heels and slices. The heels are the pieces that go on each end of the mood lamp. These are 5.5" square. The slices are made up of 4 mitered 1/2"x5.5" pieces glued together. You will need to create 2 heels and 3 slices. Additionally, you will need to create a base "slice" that will house the controls. This is made up of 4 mitered 2"x5.5" pieces.
Plane the board
You will begin with a 4'x8" board. As everything in the project is based on 1/2" pieces, you will need to initially plane the entire board down to 1/2" thickness
Cut the board
When planning on how to cut your board, you will want to make sure that the grain of the wood runs horizontally along the slices, allowing for maximum strength. One possible way to lay out your wood is given in the picture below. Always remember that you must allow for the kerf of the saw blade. On the table saw, this is generally 1/8".
For this scenario, you might want to do the following:
- Cut a 12" piece off of one end of the board. Rip this to 5.5", then cut 2 5.5" pieces from the remnant.
- Rip a 2" piece off of the length of the board.
- Rip 2 (or 3) 1/2" pieces off of the length of the board.
- Take these pieces that have been ripped, and then cut them into 5.5" strips.
- Miter each of these pieces.
Assemble the slices
- Assemble the 1/2" strips into 3 squares. Glue them up and clamp them in the Angle Strap Clamps.
