Difference between revisions of "Formlabs 3D Printer"
Jump to navigation
Jump to search
| Line 35: | Line 35: | ||
# Remove, clean, and replace the build plate. | # Remove, clean, and replace the build plate. | ||
## Pull lever holding build plate in place up, allowing the build plate to be removed. | ## Pull lever holding build plate in place up, allowing the build plate to be removed. | ||
| − | |||
[[File:Changing_Resin_1.1.jpg|200px|thumb|left|Build plate lever up]] | [[File:Changing_Resin_1.1.jpg|200px|thumb|left|Build plate lever up]] | ||
## Place the build plate on the holding rack in the Form Wash. Run the build plate through the Wash to remove resin. | ## Place the build plate on the holding rack in the Form Wash. Run the build plate through the Wash to remove resin. | ||
Revision as of 17:13, 30 October 2018
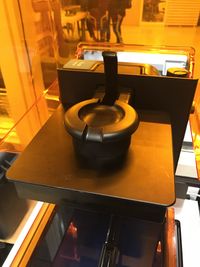
[[|thumb|250px|upright=1.5|Formlabs Form 3 3D Printer]] The Form 2 is Formlab's 3rd generation printer boasting a whole range of new features including a new peeling mechanism, heated tank, touchscreen display, wireless controls and an automated resin system. The resulting prints that come off of the Form 2 have consistently been among the highest quality objects to come off of any desktop 3D printer. This machine is best used with the Form Wash and Cure [1]
Documentation
Training
SLA Printing
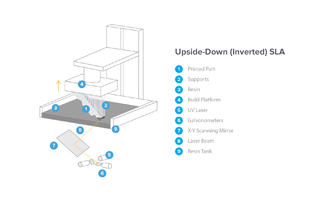
- The Form 2 employs SLA Printing.
Changing Resin
- Remove, clean, and replace the build plate.
- Pull lever holding build plate in place up, allowing the build plate to be removed.
- Place the build plate on the holding rack in the Form Wash. Run the build plate through the Wash to remove resin.
- Let the build plate air dry before replacing, secure by flipping lever down.
- Firmly pull wiper back until it's out of its slot and loose in the resin tank. Leave the wiper in the resin tank, each tank has its own wiper.
- Firmly pull tank back until it pops loose of the printer, put the appropriate lid on the resin tank, and store with wiper in tank. Be sure to wipe up any resin that spills during the removal process.
- Close lid of resin cartridge in back of printer, remove, and store.
- Slot in the new resin cartridge, tank, and wiper of the desired resin.
- Use a scraping tool to dredge bottom of new resin tank for any hardened resin or loose bits of material, remove any found bits.
Maintenance
- Every few prints the resin tank should be dredged with a scraping tool to search for any hardened resin or loose bits of material, and when resin tanks are switched out. Remove any found bits.
Resources
Link to shop Equipment page
Common errors, how to fix
More in depth to resin changing
Why choose form printer/ why choose resin type
Pictures-saved in Form 2 Wiki Pics
Remove material from failed prints, how to remove completed prints-scraping, using stand

