Difference between revisions of "Blast Cabinet"
Jump to navigation
Jump to search
Jwhipple15 (talk | contribs) |
Jwhipple15 (talk | contribs) |
||
| Line 22: | Line 22: | ||
= Documentation: = | = Documentation: = | ||
| − | http://www.skatblast.com/960-dlx-deluxe-cabinet.html | + | [http://www.skatblast.com/960-dlx-deluxe-cabinet.html Product Page] |
| + | |||
= Procedures: = | = Procedures: = | ||
# Put the parts you wish to sandblast into the cabinet | # Put the parts you wish to sandblast into the cabinet | ||
Revision as of 11:03, 14 March 2019
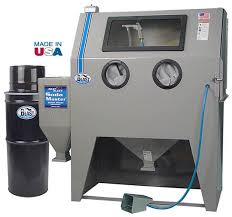
The 960-DLX DELUXE Skat Blast Cabinet has become one of "America's Favorites". TWO 90 watt floodlights and big 12" x 33" window for improved, brighter visibility when blasting. Plus, Skat Blast's C-35-M Foot-Pedal-Operated Power Gun and pickup tube system for a more powerful, even blast. Quiet Vac-50 HEPA Vacuum with HEPA Filtration collects 99.97% dust particles down to 0.3 microns.
The current Ace of the Blast Cabinet is Needed (Makerhub@georgefox.edu).
Documentation:
Procedures:
- Put the parts you wish to sandblast into the cabinet
- After placing parts in the cabinet, make sure secure the door with latch properly
- Turn on the cabinet light and fan. Switches located…………….
- Locate the power switch and turn on the sandblaster
- Insert your arms into the gloves and position yourself to have a clear view into the cabinet
- Position your foot in the foot pedal mechanism. Once pedal is depressed sand will blast out of the gun
- Picking up the parts and gun, manually aim where you need to clean on the parts
- When finished, turn the machine off
- Before removing parts, wait 5-10 mins for the dust in the cabinet to settle
- Once you remove parts make sure to close cabinet door and power off the light and fan

