Difference between revisions of "Miller Spectrum 875 Plasma Cutter"
Jump to navigation
Jump to search
| Line 1: | Line 1: | ||
{{#set: | {{#set: | ||
| − | |Is equipment= | + | |Is equipment= |
| − | |Is located in facility= | + | |Is located in facility= |
|Is used in domain= | |Is used in domain= | ||
|Has icon=File:image_pending.png | |Has icon=File:image_pending.png | ||
Revision as of 14:24, 18 February 2019
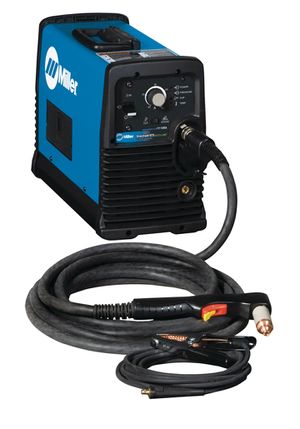
Miller Spectrum® 875 Plasma Cutter with 20 foot XT60 torch has compact size but 60 amps of output power.
It features easy operator controls, for optimum cutting and gouging performance.
Documentation:
https://www.millerwelds.com/files/owners-manuals/o242880c_mil.pdf
Procedures:
- Place fume hood over the area you will be welding at
- Turn air on
- Turn plasma cutter on
- Attach ground clamp
- Measure thickness of material being cut and refer to chart for current setting on machine
- Set the current on the plasma cutter
- Place the drag shield on the edge of the base metal, or hold ⅛ inch off the surface. Direct the arc straight down.
- Raise the trigger lock and press the trigger, this will engage the pilot arc
- Once the cutting starts, begin to slowly move the torch across the metal
- Adjust your speed so the sparks go thru the metal and out the bottom of the cut
- At the end of the cut, angle the torch slightly towards the final edge or pause briefly before releasing the trigger
- Turn off machine
- Turn off air
- Disconnect ground clamp
Warnings:
- Don't cut lead, zinc, copper, cadmium, stainless, or beryllium.
- Don't attempt to cut with the oxygen off
- Don’t cut with the vent hood off

