Difference between revisions of "Markforged 3D Printer"
m (→Training) |
(→Training: Software info) |
||
| Line 41: | Line 41: | ||
* Preparing the Mark II for the Next Print | * Preparing the Mark II for the Next Print | ||
'''Software:''' | '''Software:''' | ||
| + | |||
| + | The Mark II utilizes cloud-based print software Eiger. This means that the software can be accessed from any browser, but an account is required to do so. As such, prints will need to be started by management. | ||
| + | |||
| + | After login, the main screen returns to library. From this page, you can view and modify previous prints for reprinting or import a new STL for printing. | ||
| + | |||
| + | Once imported or selected, print material may be selected (Onyx in this case) reinforcement type may be selected and orientation may be edited in the pane on the right. Clicking a part face will orient that face to the build plate. Reinforcement and material settings may be edited with drop-down menus. All these options are available from part view. | ||
| + | |||
| + | From internal view, density (number of layers of carbon fiber) may be viewed and edited using the slider at the bottom of the page (Blue is carbon fiber, White is main material). | ||
| + | |||
| + | Material costs and totals may be viewed in the upper left of the part screen. It's worth noting the dramatic change in cost with addition of Carbon Fiber inlay. | ||
| + | |||
| + | All Mark II prints should be okay-ed with Justin before being started. Once setup is completed, prints are sent to the printer via the "Print" option. Generally, select the option to start the print from the machine, rather than automatically. | ||
'''Print Setup and Run:''' | '''Print Setup and Run:''' | ||
Revision as of 11:00, 29 November 2018
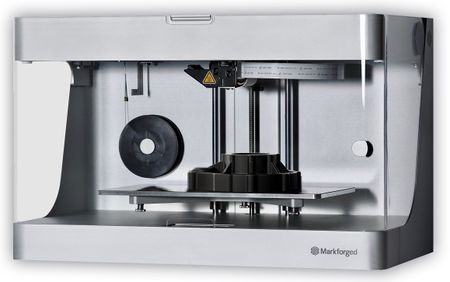
The Mark Two is a desktop professional 3D printer capable of reinforcing parts with composite fiber, affording them durability and strength. It can print in a range of materials, including Nylon, Carbon Fiber, Fiberglass, and Kevlar.[1]
General Information
See this helpful video for more background information:
Prints on the Markforged must be started by Ben or Gabi, as the software is account based.
Training
Background:
The Mark II is a FDM Printer. See the main page for more background on the FDM process. What sets the Mark II apart is its ability to inlay various materials in the print using a second nozzle. These materials include carbon fiber, fiberglass, and kevlar. These smaller materials are located on the second, smaller spool in the rear of the build space. The inlaying of these materials can be customized in Eiger (the printing software for the Markforged). The main materials for the printer are nylon and onyx, this material is contained in the dry box (black box behind the printer) in order to limit moisture contamination. Don't open this unless you need to change the material. Nylon is a typical plastic filament, which provides a clean finish and some flexibility. Onyx is nylon with chopped carbon fiber. This provides more strength and a little less flexibility.
Workflow:
Basic steps for usage are:
- Preparing Your File for Print
- Preparing the Printer
- Printing Your Part
- Removing Your Part
- Preparing the Mark II for the Next Print
Software:
The Mark II utilizes cloud-based print software Eiger. This means that the software can be accessed from any browser, but an account is required to do so. As such, prints will need to be started by management.
After login, the main screen returns to library. From this page, you can view and modify previous prints for reprinting or import a new STL for printing.
Once imported or selected, print material may be selected (Onyx in this case) reinforcement type may be selected and orientation may be edited in the pane on the right. Clicking a part face will orient that face to the build plate. Reinforcement and material settings may be edited with drop-down menus. All these options are available from part view.
From internal view, density (number of layers of carbon fiber) may be viewed and edited using the slider at the bottom of the page (Blue is carbon fiber, White is main material).
Material costs and totals may be viewed in the upper left of the part screen. It's worth noting the dramatic change in cost with addition of Carbon Fiber inlay.
All Mark II prints should be okay-ed with Justin before being started. Once setup is completed, prints are sent to the printer via the "Print" option. Generally, select the option to start the print from the machine, rather than automatically.
Print Setup and Run:
Post-Processing and Reset:
Machine Settings:
References:
Mentors Only
This section will be for information that pertains only to Aces and Mentors.

