Difference between revisions of "Wooden Train Whistle"
| Line 81: | Line 81: | ||
<br> | <br> | ||
<br> | <br> | ||
| − | <strong>Step 11:</strong> . | + | <strong>Step 11:</strong> Select the triangular area, go to the Features tab, and click on Extruded Cut. In the left column, check the box for Direction 2 so that the extruded cut is extending both directions out of the reference plane. Click the green checkmark when you are finished. |
TW11 | TW11 | ||
<br> | <br> | ||
<br> | <br> | ||
| − | <strong>Step 12:</strong> . | + | <strong>Step 12:</strong> Click the Section View icon again to see the full drawing again. Hold the Shift key and select both the top face and the extruded cut face as shown in the screenshot below. |
TW12 | TW12 | ||
<br> | <br> | ||
<br> | <br> | ||
| − | <strong>Step 13:</strong> . | + | <strong>Step 13:</strong> Go to the Features tab and click the drop-down arrow under Linear Pattern. Click on Circular Pattern. With any luck, both the Boss Extrude and the Cut Extrude will have automatically populated the Features and Faces section in the left column. Choose the Pattern Axis as the edge of the square column that is opposite the Cut Extrude that we performed in a previous step. There's more than one way to get the correct number of instances and spacing. In this example, I chose 4 instances equally spaced over 360 degrees. When everything looks good, click the green checkmark. |
| + | |||
| + | TW13 | ||
| + | <br> | ||
| + | <br> | ||
| + | <strong>Step 14:</strong> Select the Top Plane in the Design Tree and start a new sketch by going to the Sketch tab and clicking Sketch. It also helps to be "Normal To" your sketching plane; you can find that icon by clicking on the Top Plane in the Design Tree. On the Sketch tab, click the drop-down arrow next to the rectangle and choose Center Rectangle. Draw a rectangle centered on the origin by clicking on the origin and dragging. Check the "For Construction" box in the left column before clicking the green checkmark. Use the Smart Dimension tool to make the rectangle a square with sides at 10/16 inch. | ||
| + | |||
| + | TW14 | ||
| + | <br> | ||
| + | <br> | ||
| + | <strong>Step 15:</strong> Draw four circles--one centered on each corner of the construction square. Use the Smart Dimension tool to set the diameter of each circle at 1/2 inch. | ||
| + | |||
| + | TW15 | ||
| + | <br> | ||
| + | <br> | ||
| + | <strong>Step 16:</strong> On the Features tab, click the Extruded Cut to create the four drilled holes. There's room for creativity here in choosing the depth of your drilled holes because the depth of the hole directly affects the frequency at which it resonates. For now, set the depth of all four holes to 4 7/16 inches (4.4375 inches). | ||
| + | |||
| + | TW16 | ||
| + | <br> | ||
| + | <br> | ||
| + | <strong>Step 17:</strong> If math equations give you the urge to throw up, you'll definitely want to skip this step. | ||
| + | |||
| + | TW17 | ||
| + | <br> | ||
| + | <br> | ||
| + | <strong>Step 18:</strong> . | ||
| + | |||
| + | TW18 | ||
| + | <br> | ||
| + | <br> | ||
| + | <strong>Step 19:</strong> . | ||
| + | |||
| + | TW19 | ||
| + | <br> | ||
| + | <br> | ||
| + | <strong>Step 20:</strong> . | ||
| + | |||
| + | TW20 | ||
| + | <br> | ||
| + | <br> | ||
| + | <strong>Step 21:</strong> . | ||
Revision as of 22:06, 10 June 2021
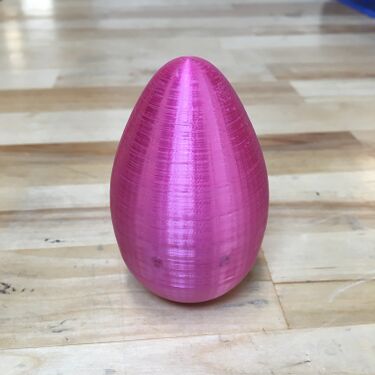
In this TV, we will take you through the steps of designing an egg shaker in SolidWorks, preparing the print in PrusaSlicer, and then 3D printing it using the Prusa 3D Printer.
Procedure
Buckle up...
SolidWorks
Step 1: Open SolidWorks 2020, and select a new part. Don't forget to save your file frequently as you go. In the bottom-right corner of your SolidWorks window, change the units to IPS (inch, pound, second).
TW1
Step 2: Select the Front Plane in the design tree (the left column on your screen) to begin your sketch. Click on the Sketch tab above and click Sketch.
TW2
Step 3: Draw a rectangle with its bottom-left corner coincident with the origin. Use the Smart Dimension tool to make this rectangle a square with 3/4-inch sides.
TW3
Step 4: Go to the Features tab and click on Extruded Boss/Base. Click on the Reverse Direction icon underneath the Direction 1 section in the left column to ensure that the square is extruded in the negative "y" direction. Set the depth to 9.5 inches, and click the green checkmark when you are finished.
TW4
Step 5: You should now have a solid square column. On the Features tab, click on Reference Geometry and select a Plane. The left column will ask for three reference points; choose the origin, the diagonal point across the 3/4-inch square, and the point at the bottom of the extrusion as shown in the screenshot. If you imagine the square column as a really tall sandwich with the 3/4-inch squares at the top and bottom acting as the pieces of bread, the reference plane we are creating acts as the knife that cuts the sandwich diagonally into two triangular sandwich halves. Click the green checkmark when you are finished.
TW5
Step 6: We are now going to draw a sketch on the plane we just created. With the plane selected, go to the Sketch tab and click on Sketch. Draw a rectangle starting from the origin to the opposite diagonal edge. Use the Smart Dimension tool to set the vertical side of the rectangle to 3/4 inch. Now would be a good time to double-check that your drawing is fully defined in the bottom right corner of the screen. You can make this rectangle a construction rectangle
TW6
Step 7: From the bottom right corner of the rectangle, draw a vertical line along the edge of square column. Use the Smart Dimension tool to set the length to 3/4 inch.
TW7
Step 8: Draw a diagonal line from the vertical line to the midpoint of the rectangle's bottom line as shown in the screenshot.
TW8
Step 9: Finally, to ensure SolidWorks knows we are creating a closed area, draw a line from the midpoint of the rectangle's bottom line to the edge of the rectangle.
TW9
Step 10: This next step will be a lot easier if you select the plane and click on the Section View icon at the top of your drawing space. This will allow you to see a cross-section of the square column and select the enclosed area in the sketch easier. Click the green checkmark. SolidWorks often indicates enclosed areas in a sketch with darker shading as shown in the screenshot below (hence the darker triangle that we just drew).
TW10
Step 11: Select the triangular area, go to the Features tab, and click on Extruded Cut. In the left column, check the box for Direction 2 so that the extruded cut is extending both directions out of the reference plane. Click the green checkmark when you are finished.
TW11
Step 12: Click the Section View icon again to see the full drawing again. Hold the Shift key and select both the top face and the extruded cut face as shown in the screenshot below.
TW12
Step 13: Go to the Features tab and click the drop-down arrow under Linear Pattern. Click on Circular Pattern. With any luck, both the Boss Extrude and the Cut Extrude will have automatically populated the Features and Faces section in the left column. Choose the Pattern Axis as the edge of the square column that is opposite the Cut Extrude that we performed in a previous step. There's more than one way to get the correct number of instances and spacing. In this example, I chose 4 instances equally spaced over 360 degrees. When everything looks good, click the green checkmark.
TW13
Step 14: Select the Top Plane in the Design Tree and start a new sketch by going to the Sketch tab and clicking Sketch. It also helps to be "Normal To" your sketching plane; you can find that icon by clicking on the Top Plane in the Design Tree. On the Sketch tab, click the drop-down arrow next to the rectangle and choose Center Rectangle. Draw a rectangle centered on the origin by clicking on the origin and dragging. Check the "For Construction" box in the left column before clicking the green checkmark. Use the Smart Dimension tool to make the rectangle a square with sides at 10/16 inch.
TW14
Step 15: Draw four circles--one centered on each corner of the construction square. Use the Smart Dimension tool to set the diameter of each circle at 1/2 inch.
TW15
Step 16: On the Features tab, click the Extruded Cut to create the four drilled holes. There's room for creativity here in choosing the depth of your drilled holes because the depth of the hole directly affects the frequency at which it resonates. For now, set the depth of all four holes to 4 7/16 inches (4.4375 inches).
TW16
Step 17: If math equations give you the urge to throw up, you'll definitely want to skip this step.
TW17
Step 18: .
TW18
Step 19: .
TW19
Step 20: .
TW20
Step 21: .


