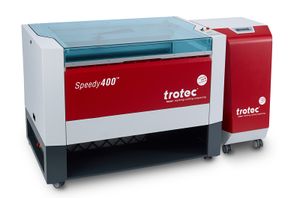
Speedy 400
Make: Trotec
Model: Speedy 400
Ace: Jack Sides jsides22@georgefox.edu
Location: Prototype Lab
Description
The Trotec Speedy 400 laser engraver is used to engrave and cut materials based on specified images and shapes. The working area of the laser is 24" x 29". This is useful for making enclosures out of acrylic, engraving designs into many materials, creating trophies, and cutting any two dimensional shape out of a variety of materials. It also has a rotary attachment which enables cylindrical objects such as drinking glasses and hydro flasks to be engraved with detailed designs.
Here is an example of this piece of equipment being used.
Insert video media here.
Documentation
Terminology
- Inkscape - The program you will be using to design is Inkscape. It allows you to type in words, edit logos, make your own logos and such to engrave or cut out of your material.
- Job Control - The program that interacts with the laser cutter to perform a cut. Job Control lets you set up/create Material Profiles, change between the HoneyComb Table and the Rotary tool (mostly used for Hydroflasks), and choose a location to cut on your material.
- Focusing tool - Used to focus the laser cutter.
- Stroke - This is the type of line that should be used when cutting.
- Repeat Cut Line - Can be used in JobControl to reproduce the same cut line that was just cut.
- Outline Job - Can be used in JobControl to trace the job that is going to be cut to show where job extends.
- Bitmap - Representation of an image as bits of information (pixels); used to allow logos/stencils to be changed into colors.
- Vector - Representation of an image as shapes, rather than bits; used to allow logos/stencils to be modified as objects.
- Trace Bitmap - Can be used on a bitmap to to turn it into a vector.
- Honeycomb Table - This is the honeycomb shaped metal tray that holds flat material during a cut. It is used for most cut jobs.
- Rotary Tool - When engraving water bottles or glasses, this accessory is used to hold the object in place as well as rotate it while performing a cut.
User Manual
Training
Overview
Performing a cut or engrave with the laser will always begin with Inkscape by opening/importing an image, pdf, DXF, or similar file. If you do not have a file yet then it can also be used to create geometries. Once a file has been brought into Inkscape, it must be adjusted so that job control can distinguish between what should be cut out of the material and what should be engraved. A cut is indicated by a hairline red stroke (in the RGB color scheme) and an engrave is indicated by the color black. After the graphic is prepared, it is transferred to job control using [File] > [Print] and making sure trotec is selected as the device. It will then pop up in the job list on the right hand side of JobControl. At this point the laser cutter should be set up by turning it on, placing the material on the honeycomb table, and then raising the table to focus the laser. The final steps are then to click the USB icon in job control to connect to the laser cutter, drag the job onto the to scale honeycomb table, set the correct material properties, and then click the play button to perform the cut/engrave. When performing an engrave on a cylindrical object, the set up process in Inkscape is the same but there are a few differences in job control and laser cutter itself. Primarily, the honeycomb table must be exchanged for the rotary tool, which must be done while the laser cutter is OFF. The laser cutter should automatically recognize that the rotary is attached. The only change in job control is that the accessory should be changed in the settings from the honeycomb table to the rotary tool.
Demonstration
Insert text
General Procedure
Insert text
Safety
Insert text
Certification
Troubleshooting
Maintenance
General maintenance
Insert text
Specific Maintenance Tasks
| Maintenance Procedure | Frequency | Done By |
|---|---|---|
| Sample | Sample | Sample |
Description here.
Documentation
Essentially the same as Speedy 300. The Speedy 400 uses the same software and general setup as the Speedy 300, however it has a larger bed and a few backend setting differences.
NOTE: Currently, the Speedy 400 should not be used for acrylic**. There are some issues with settings/airflow that cause acrylic to often catch fire while cutting (which, as you would imagine, is bad)
** If you know what you are doing and are very careful, small (<10 inches) pieces of 1/4" or 1/8" acrylic allow for sufficient airflow to avoid catching fire. Small pieces of 1/2" acrylic can often work as well, as long as you are careful. If the fumes light fire while cutting, pause the print IMMEDIATELY (the same button as start), or, if needed, stop it entirely (although this will abort the cut and you will not be able to continue). Often pausing allows the fire to go out and the acrylic to cool down, so for small cuts you may be able to continue, carefully, after pausing. If you must cut large sheets of acrylic, remove the paper from the area you are cutting, as close to the size of your cut as possible. Although it is not the paper that is burning, removing it seems to reduce the possibility of fire. Try not to remove any more paper than absolutely necessary, as the paper keeps the acrylic clean and protected from scratches when in the stock pile.

