Speedy 300
The Trotec Speedy 300 laser engraver is used to engrave and cut materials based on specified images and shapes. Also includes a rotary attachment to engrave cylindrical objects.
Documentation
Training
CorelDRAW
The program you will be using to design is CorelDraw. It allows you to type in words, edit logos, make your own logos and such to engrave or cut out of your material.
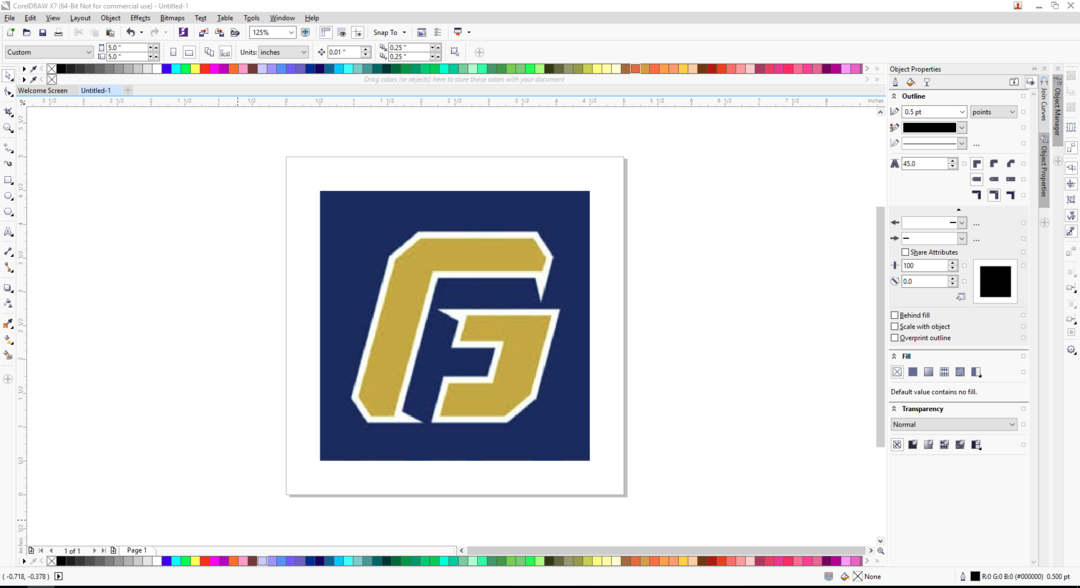
First off, to get your design, just copy an image and paste it into CorelDraw just like you would if you were plagiarizing an essay. Once you paste it in, hit P in order to center the image on the page. In the top left, you can alter the dimensions of the page you are putting the image on, and even the image itself. If you want to keep the image dimensions consistent, but just scale it down, click the lock button to the right of these dimensions. If you want to make your own design using text, squares, circles, etc, you can find everything you need in the column on the far left of the client.
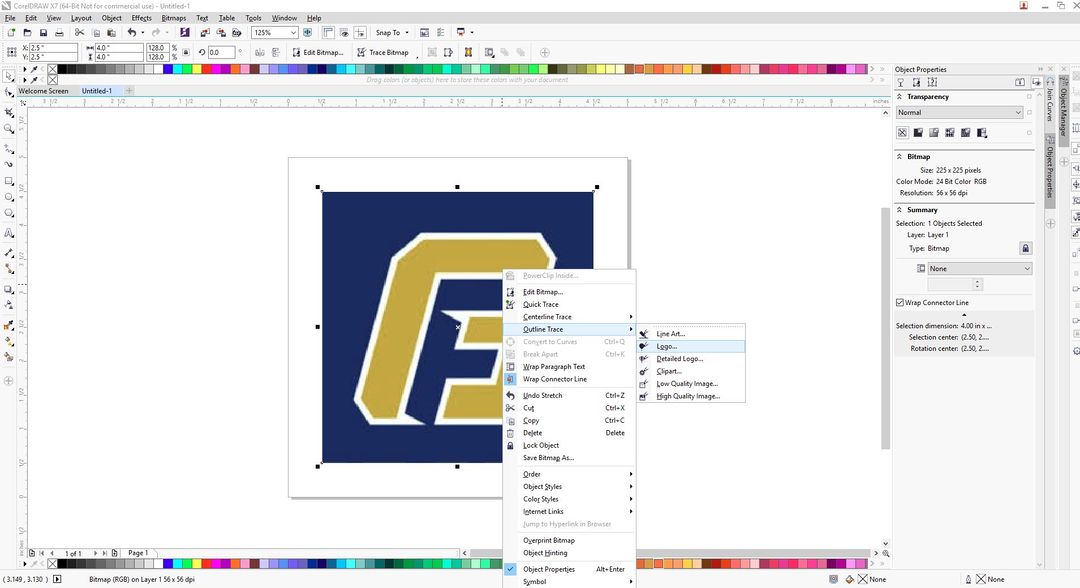
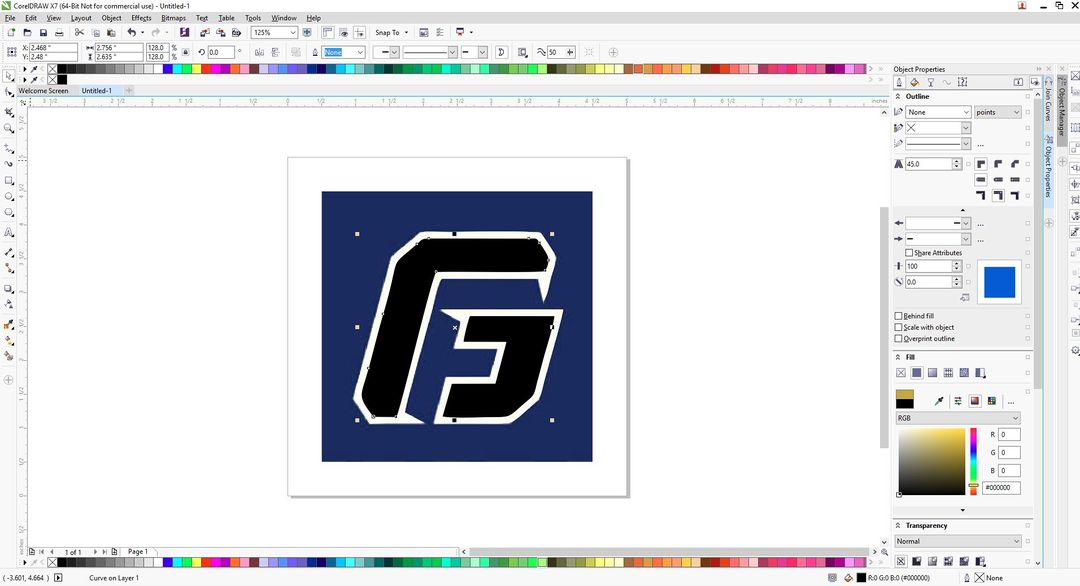
Once you have your design, we need to alter the colors a little bit so the Laser Cutter can understand what you want it to do. It goes like this: a red line with a hairline thickness will cut, and anything that is black will engrave. In order to do this, we need to split up the image into different pieces. This is called BitMapping, where it will divide the image into different pieces based on the color. Just right click and select Outline Trace → Logo. This works for the vast majority of things. If the detail is not good enough, try the other options and have some fun. After this, right click on the image and select Ungroup All Objects. This splits the image up into groups based on color, so you can tell the Laser Cutter what to cut and engrave.
Here is where you change colors. Select a block of color, and on the right, you will see a window allowing you to change the Outline (line thickness) and Fill (color). Be sure to set the color scale to RGB. You will see values for R, G, and B, where all colors can be made using these. When each color has a 0 next to it, it will be fully black. When the red has a 255 next to it and the other have 0, it will be fully red. Make sure you check these bit values before continuing, since the machine is set to cutting material ONLY when it sees 255, 0, 0, and it will engrave material ONLY when it sees 0, 0, 0. Everything else, make it white, which is 255, 255, 255. You can drag around the value in the little box of colors to make this quicker.
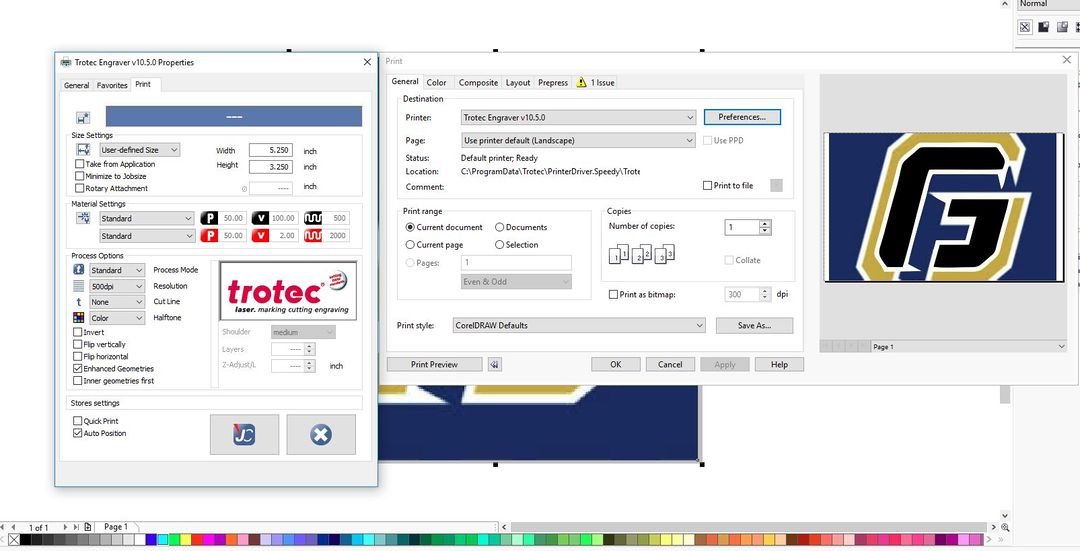
So once you have finished your design, it’s time to send it to the Laser Cutter! Hit print, make sure it is sending to Trotec Engraver. Select Preferences to make sure you select Minimize to Jobsize, 500 dpi, and consult the supervisor for the Halftone option. For normal engraving on most materials, you’ll use Black and White, but there are some areas where you can alter it. Sometimes the Minimize to Jobsize option does not work. If this happens, enter the dimensions of your design into the top right of the Preferences.
Then you can save in info by selecting the button that shows the JC logo near the bottom of the window, and select OK to send the design to Job Control.
Job Control & Laser Cutter
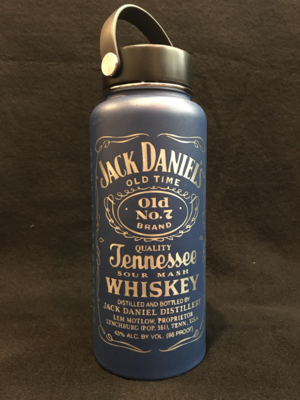
Job Control lets you set up/create Material Profiles, change between the HoneyComb Table and the Rotary tool (mostly used for Hydroflasks), and choose a location to cut on your material.
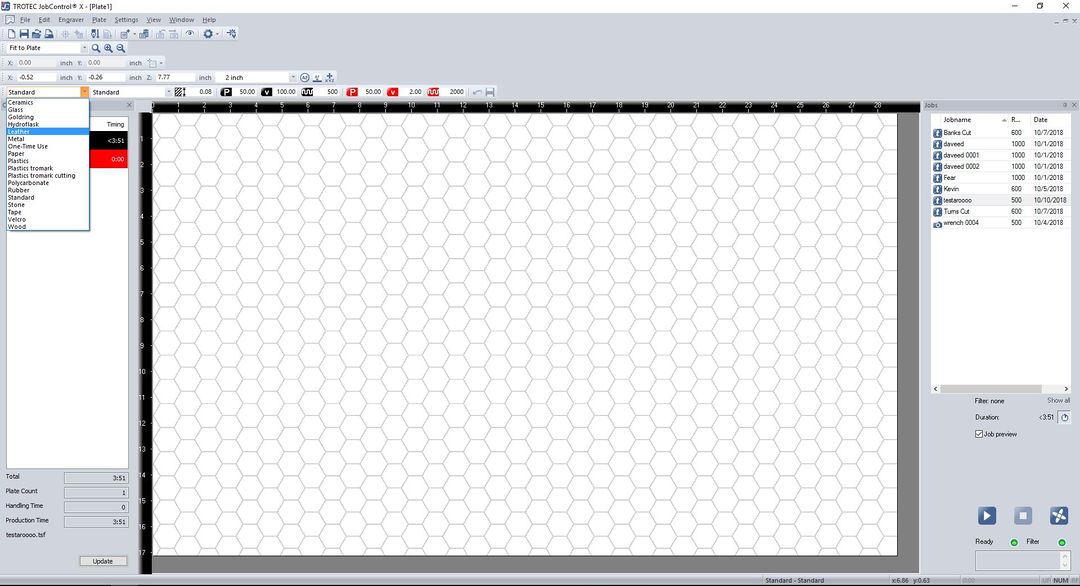
After you send your design to Job Control it will let you name your design and it will store it in a window on the right. If you do not see your design, be sure to select See All at the bottom of that window. This lets you see files ALL dpi types, rather than just a specific dpi type. Then select your material at the top left.
You can check the print preview by double clicking the box showing your preview in the bottom right. If it is not locked onto your design, then it did not Minimize to Jobsize, and when it starts, you will look like an idiot when you see that it is not cutting your material in the right place, or it is just missing your material completely. Go back to the Preferences in Corel Draw, do what you were instructed to do, then resend.
Alright, now it’s time to focus the laser onto your material. On the left of the Laser Cutter, there is its filter with a similar color scheme that looks like its nephew. On top of that will be a piece of metal that is shown below. This mounts on the right side of the laser and sets the material a certain distance from the laser. Put your material in the top left of the Honeycomb Table, mount the metal piece on the right side of the laser, the begin raising the table. The moment the metal thing falls of from hitting your material, stop raising the table. Be sure to slow down toward the end of the process to assure the laser does not get too close to your material. You can then use the controls to put the laser at the top left of your material (assuming it is square). This keeps you and others from being idiots and wasting material.
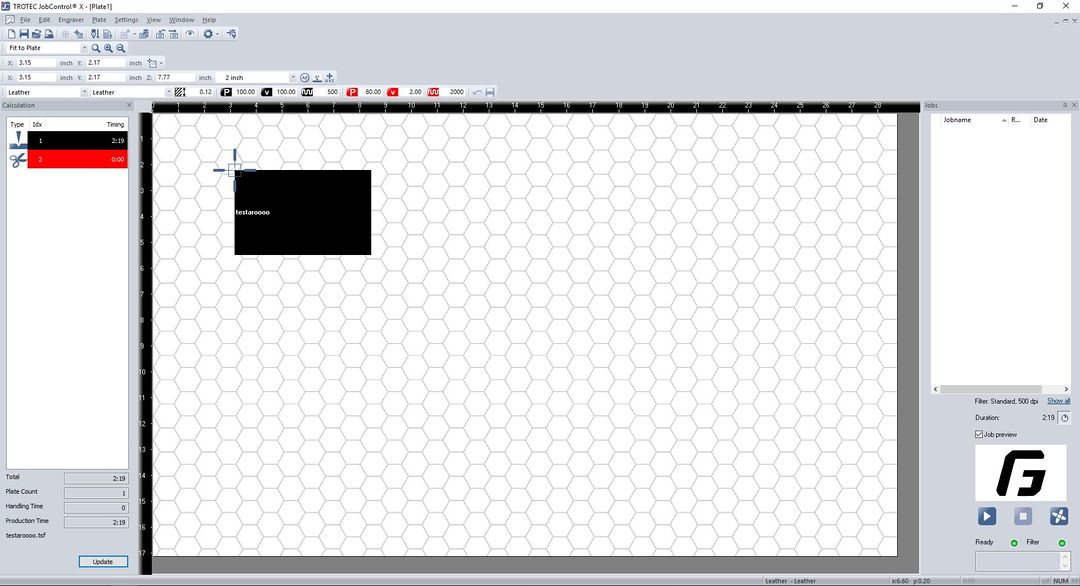
Double click/drag your design into the middle area and lock the top left corner of the design into the bottom right of the cursor. If the cursor is not already visible, be sure that the laser cutter is connected to Job Control via the USB symbol in the bottom right. You can click the Update in the bottom left to see the duration of the job, and now you are ready to click the Play button in the bottom right. For bigger jobs, the Laser Cutter will take a little bit of time to read the design. If it does not start immediately, don’t be scared. Just be supportive and it will begin shortly. If it does not start at all, ask for help from a worker.
Once the job starts, stay with it. Be sure it is actually engraving/cutting the material. If it is not doing what it should be, stop it and consult the supervisor for assistance.

