Difference between revisions of "Prototype Lab"
Jwhipple15 (talk | contribs) |
m |
||
| Line 47: | Line 47: | ||
Sweep when needed. | Sweep when needed. | ||
| − | Immediately clean up any spilled resin. | + | Immediately clean up any spilled Formlabs resin. |
Always leave the space better than you found it. | Always leave the space better than you found it. | ||
| Line 57: | Line 57: | ||
If you are working with a machine, and you don’t know the proper way to do what you are attempting - ASK SOMEONE! Learn! Become a professional. Learn the craft. This is an educational space. You might think it will be quick and you can just get it done “your” way and not learn how to do it correctly. Be a Professional and learn the proper way, and then be available to teach others. | If you are working with a machine, and you don’t know the proper way to do what you are attempting - ASK SOMEONE! Learn! Become a professional. Learn the craft. This is an educational space. You might think it will be quick and you can just get it done “your” way and not learn how to do it correctly. Be a Professional and learn the proper way, and then be available to teach others. | ||
| − | One very important, and likely difficult part of being a professional is to correct others when they are not being professional. It is your responsibility to speak up when you see somebody doing something inappropriate. If you see somebody doing something unsafe, not resetting the space, or being unprofessional, the professional thing to do is to remind them of the three commandments and ask them politely to correct their action. This is OUR space, not any | + | One very important, and likely difficult part of being a professional is to correct others when they are not being professional. It is your responsibility to speak up when you see somebody doing something inappropriate. If you see somebody doing something unsafe, not resetting the space, or being unprofessional, the professional thing to do is to remind them of the three commandments and ask them politely to correct their action. This is OUR space, not any individual's. As a group, we expect everyone in the space to keep the space safe, clean, and operable for everyone. |
If someone acts disgracefully unprofessional to you in the Prototype Lab, you are welcome to bring the issue to Ben and Gabi's attention. | If someone acts disgracefully unprofessional to you in the Prototype Lab, you are welcome to bring the issue to Ben and Gabi's attention. | ||
Revision as of 14:23, 18 October 2018
The prototype lab contains a group of 3D printers and a laser cutter (more to come in the near future)!

The Aces of the Prototype Lab are: Ben Kraske (bkraske16@georgefox.edu) and Gabi Lorenzo (glorenzo16@georgefox.edu).
Equipment Overview
| Name | Company | Model |
|---|---|---|
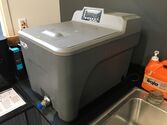
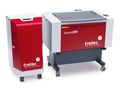
| Dissolvable Support Bath | Support Cleaning Apparatus | 1200HT |
| F370 3D Printer | Stratasys | F370 |
| Formlabs 3D Printer | Formlabs | Form 3 |
| Laser Cutters | Trotec | |
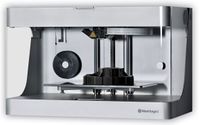
| Markforged 3D Printer | Markforged | Mark II |
| Prusa 3D Printer | Prusa | i3 MK3 / i3 MK3S |
| Speedy 300 | Trotec | Speedy 300 |
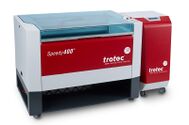
| Speedy 400 | Trotec | Speedy 400 |
3 commandments
1. Safety First
Safety First is the rule we hold highest of the three. Given the delicate nature of our machines, and the different chemicals and materials we use in the Prototype lab, this rule applies to both the safety of you, and the machines.
Keeping yourself safe in the Prototype Lab is very easy, as there are very few ways to hurt yourself or the machines. However, proper procedure must be followed at all times.
Basic principles of how to implement Safety First in the Prototype Lab:
- Do not touch the extruder heads of the 3D printers when they are running. They will be very hot and will burn you. Wait for the machine to cool off.
- Use gloves when handling chemicals such as Sodium Hydroxide (use the heat protecting gloves when retrieving items from the Sodium Hydroxide bath), Isopropyl or Denatured Alcohol (use Nitrile gloves if handling extensively after removing from the Form Wash), and Lacquer Thinner (use Nitrile gloves when using lacquer thinner to clean residue off of engraved Hydroflasks). You may use gloves whenever you feel necessary, but these are circumstances where gloves are absolutely required.
- Make sure you read through the MSDS (Material Safety Data Sheets) binder mounted by the sink so that you are up-to-date on safety procedures regarding the chemicals within the lab.
- If chemicals ever get on your skin or in your eyes, follow the MSDS. Wash it off or out (there is an eye washing station in front of the Machine Shop about 30 feet feet away). If it is an emergency, do what you need to do to make sure you and those around you are safe.
- Make sure you know how to use the spill kit (located to the right of the sink).
- If there is a chemical spill, we do have a spill kit. First, evacuate the lab and get everyone out. This means the lab should be shut down until the spill has been properly dealt with. Second, call Justin Johnson whose information should be posted next to the Emergency Response Guide (bright yellow and by the door leading to the main space). If Justin does not answer, call the Campus Public Safety office (formerly Security Services) whose information will be in the Emergency Response Guide or can be found online. Third, if you feel it is safe to do so, deploy the spill kit (located to the right of the sink).
- Be aware that laser cut items can have sharp edges that could cut you.
- Be careful when trying to remove support material by hand from a print off of the Dimension. When the support material breaks, it leaves sharp edges and shatters extremely sharp shards that will cut you if you are not careful.
2. Reset the Space
The Prototype Lab has a specific organization to it, even though sometimes it looks like chaos. Put whatever you use back where you found it. There is a place for everything and everything has a place. This rule applies to everything in the space. If you move a chair, put it back. If you use a tool, put it back. If you use a pen, put it back. Do not leave your projects in the Prototype Lab, take them with you. Do not leave random note sheets that pertain to nothing out. Throw away your trash and recycling.
We have allowed food and drink in the space. Resetting the Space means that you don’t leave wrappers, or trays, or anything that wasn’t there when you came in.
If you are employed in the space, this still applies to you. Do not take tools from the Hub and then store them in the Lab. If we need more tools, speak with Ben and Gabi and they can evaluate the situation and, if necessary, they will get more tools.
Now, we understand that sometimes you need to leave things out. Maybe you are in the middle of a large print and you need something to run overnight. In cases like this, it is okay, but you NEED to leave a note on your system so that others know the situation.
When parts finish on a 3D printer, remove them from the build plate and place them in the completed parts bin so that the owner can pick up their part.
Always put any unused materials from the laser cutter back on the storage shelf, and throw away unusable scrap.
Sweep when needed.
Immediately clean up any spilled Formlabs resin.
Always leave the space better than you found it.
3. Be Professional
This commandment has two sides to it. It covers the idea of acting like professional (which Webster’s defines as “exhibiting a courteous, conscientious, and generally businesslike manner in the workplace”). The term also describes the standards of education and training that prepare members of the profession with the particular knowledge and skills necessary to perform their specific role within that profession. Hopefully, you are learning both of these as part of your education at George Fox University. In the Prototype Lab we expect you to develop as a courteous, conscientious, and skilled craftsman, understanding the tools and equipment in the Maker Hub and how to use them effectively.
Being a professional has some obvious ramifications in terms of behavior. First, be Christlike. Think of others better than yourselves. Share. If you have been printing a lot or using the laser cutter for a prolonged time and someone else is waiting for the machine, let them use the machine for a while. This is being a professional.
If you are working with a machine, and you don’t know the proper way to do what you are attempting - ASK SOMEONE! Learn! Become a professional. Learn the craft. This is an educational space. You might think it will be quick and you can just get it done “your” way and not learn how to do it correctly. Be a Professional and learn the proper way, and then be available to teach others.
One very important, and likely difficult part of being a professional is to correct others when they are not being professional. It is your responsibility to speak up when you see somebody doing something inappropriate. If you see somebody doing something unsafe, not resetting the space, or being unprofessional, the professional thing to do is to remind them of the three commandments and ask them politely to correct their action. This is OUR space, not any individual's. As a group, we expect everyone in the space to keep the space safe, clean, and operable for everyone.
If someone acts disgracefully unprofessional to you in the Prototype Lab, you are welcome to bring the issue to Ben and Gabi's attention.
General 3D Printing Knowledge
3D printing is the process of joining material together to create a three-dimensional object using computer control. It is a form of additive manufacturing. Objects are created using a 3D model. There are many different types of 3D printing, and the Prototype Lab utilizes two types which are FDM (fused deposit modeling) and SLA (stereolithography).
In the Prototype Lab, objects are most commonly printed from an STL file. This means if you create a part in SolidWORKS that you must save the file as a STL instead of a SLDPRT. Once the file is in STL form, it can then be processed by a slicer software. The slicer software converts the 3D model into thin layers and produces a G-code file. G-codes communicate with the chosen 3D printer, giving it directions on how to print the object.
Different 3D printers will run with different slicer programs. Typically a program will allow you to edit various parts of the process. One common consideration will be the layer thickness. This is the resolution at which the printer will print at. Each printer will have its own range of resolution. The thinner the layer thickness (higher resolution), the more detail you will get, but the print will be created more slowly. The thicker the layers (lower resolution), the less detail you will receive, but the object will be printed more quickly. Another consideration is support. For objects with overhangs, holes, etc., support will be needed. This will give the printer a surface to print on so that it can continue to build the print layer by layer. Each printer uses supports differently. Some printers have break away support while other have dissolvable support material.

There are common places of potential failure which you should watch for every print. The following points of failure specifically apply to FDM prints.
- Adhesion:
- When the print first starts, it is prudent to ensure that the filament is properly adhering to the build plate.
- Watch the print until the first dozen layers have been printed to make sure it is starting off successfully.
- The print can start sliding around the plate at anytime, although it is much more likely to fail toward the beginning of the print.
- A tall and skinny print is much more likely to struggle with adhesion than a short and stout print. Taking time to discern the best orientation for your print is always a good call.
- Adding a raft (sometimes called a brim) will also help if you print is struggling with staying adhered to the plate.
- Clogging
- Sometimes the extruder will clog causing the print to fail.
- This typically can be seen when a clump of filament balls up at the end of the nozzle.
- If this occurs, immediately cancel the print and remove the clumped filament. Make sure that the nozzle is still able to extrude filament, if not, you may need to open up the extruder and clean it. Keep working on it until you are able to extrude filament again.
- Air Extruding
- This means that the extruder thinks it is extruding filament when it really is not.
- Immediately cancel the print. Then restart the print.
- If the printer is still air extruding, cancel the print and unload the filament. You can try reloading and starting the print again.
- If the problem persists, you will probably need to take the extruder apart and clean it out before attempting any further prints.
General Laser Cutting Knowledge
Laser cutting directs a high-powered laser through optics. The laser cutter follows a predetermined pattern to engrave or cut the material. Laser cutting is a great way to get a professional-looking surface finish.
- Can be used for many different materials ranging between wood, glass, rock, plastics, and even engraving Hydroflasks.
- Works best on flat surfaces or cylinders with constant diameters.
There are a couple common steps that must be done correctly when using the laser cutter:
- Always make sure that the lens and cone are clean before starting a print.
- Correctly focus the laser above the material, using the correct focusing tool based off of the lens type.
- Choose the correct material profile for the material you are using.
- Clean the bed of the laser cutter when you are finished.
| Equipment | Icon | Image |
|---|---|---|
| Dissolvable Support Bath |  |
 |
| F370 3D Printer | [[|center|x100px|link=F370 3D Printer]] | [[|center|x125px|link=F370 3D Printer]] |
| Formlabs 3D Printer | 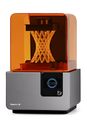 | |
| Laser Cutters |  | |
| Markforged 3D Printer |  |
 |
| Prusa 3D Printer |  | |
| Speedy 300 | | |
| Speedy 400 |  |
 |

Dissolvable Support Bath
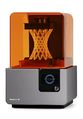
Form-2
Laser cutter image
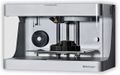
Mark two
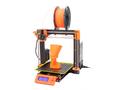
Prusa printer image
Laser cutter image

Speedy 400


