Difference between revisions of "Photo Table"
| Line 42: | Line 42: | ||
* 360 - 360 degrees | * 360 - 360 degrees | ||
| − | '''[Media:UserGuide_en.pdf|Photo Table User Manual]''' | + | '''[[Media:UserGuide_en.pdf|Photo Table User Manual]]''' |
'''[[Media:eos7d-mk2-im5-en.pdf|Canon EOS 7D Mark II User Manual]]''' | '''[[Media:eos7d-mk2-im5-en.pdf|Canon EOS 7D Mark II User Manual]]''' | ||
Revision as of 16:59, 11 February 2022
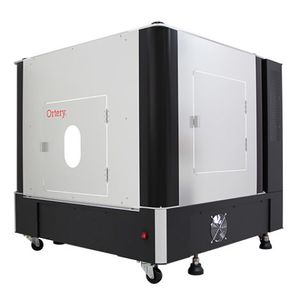
Make: Ortery
Model: 3D PhotoBench 260
Serial Number: 1260110014004
Ace: Kaitlyn Johnson (kjohnson20@georgefox.edu).
Location: The Vault
Description
The Photo Table, or Photobench as called by its manufacturer Ortery, is a device which links to a lab PC specifically designated for this device and enables users to take still photos, 360 photos, and videos of various products and items on flat white backgrounds like the ones you see online for products you might view on a daily basis. If you have ever wondered how those product pictures are taken, this is it. This makes the photo table perfect for creating professional grade product photos for projects and presentations.
Documentation
Terminology
- Ortery Capture - This is the software that you will use to interact with the photo table in order to adjust the lighting, turntable, and take pictures.
- Canon EOS 7D Mark II - This camera mounts on the side of the photo table and is used to take photos through the Ortery Capture software.
- 360 - 360 degrees
Canon EOS 7D Mark II User Manual
Training
Operation
Confirm that the unit is plugged in and then turn on the photo table using the large red power switch. Note that nothing will happen when you turn on the switch until you are logged into Ortery Capture and that you will not be able to log into Ortery Capture unless the photo table is turned on. After the the table is turned on, log onto the computer next to it using your standard George Fox log in. You will need to log into Ortery capture as well. The username is Cameraman and the password is Nikond70. Once you are logged into Ortery capture the lights in the photo table should automatically turn on. Place the object you are trying to photograph onto the center of the turntable using the door on the right side of the machine. It is especially important to have the object centered on the turntable if taking 360 photos because otherwise it will appear to shift side to side instead of just spinning. Now you can set up the Canon EOS 7D Mark II; there is an adjustable mount on the side of the photo table that holds the camera still during the photo process and can be adjusted to find the perfect angle. Finish the setup process by plugging the camera into the computer using a USB cable. The rest of the process will take place in Ortery capture. There you can adjust the camera settings, light intensity and direction, and turntable to take the perfect picture. Once you are done with the photo table, reset the space by logging out, turning off the table, and cleaning out any debris from the table.
Demonstration
In order to use this device, you must be able to demonstrate the following:
- Set up the Ortery Photo Table and the software on the computer, along with connecting the camera and getting the settings dialed in.
- Set up the camera and object to be photographed.
- Take a 360 photo of the object.
- Export the file to a safe location for later access and use.
General Procedure
Setting up the Photo Table and the Camera
- Turn on the Photo Table before bringing up the Ortery Software. The power switch is a large red switch on the bottom right of the front of the machine. Note that turning on the power has no visual effect, but is necessary for the software so that the system can be found when the software is brought up.
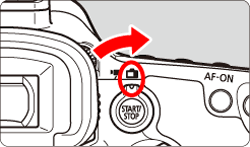
- Turn on the camera as well. Make sure the camera is set up according to the instructions linked to by the User Manual - “Compatible Camera Settings - To see the required settings for any compatible camera, visit: http://www.ortery.com/camera-settings” (p. 7). The Camera is a Canon EOS 7D Mark II - Camera Manual (link to the manual here might be nice).
- “Auto Power off” to Off or Disable (page 69 of the manual)
- “Auto rotate” to Off or Disable (page 395 of the manual)
- Move camera dial to M for Manual Mode. (Mode Dial - page 29)
- If applicable, disable the Continuous AF (auto focus)
- Make sure your Camera is in Picture Mode.
Bring up the Ortery Software
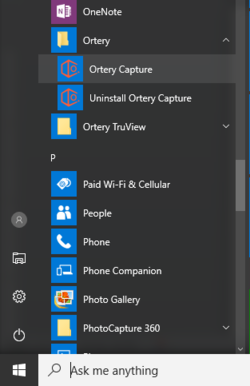
- Launch the Ortery Capture software
- The software can be launched from the Windows Start menu or by double-clicking the desktop icon or app icon.
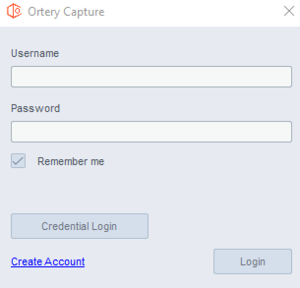
- To login to the software type in your Username and Password and click Login.
- Username: Cameraman
- Password: Nikond70 (which is not the camera we are using by the way)
- You will need to set up a “workspace” - this is just the directory where your pictures will get saved when you save them. The instruction manual states, under Workspace Setup - “NOTE – Do not select a folder with automatic cloud backup like Google Drive.” - this is generally because such a system makes it difficult to write to the drive while the auto backup is updating what is being written - it can sometimes cause conflicts.
- The Quick Operation Guide will come up with some quasi-useful information. Feel free to page through it.
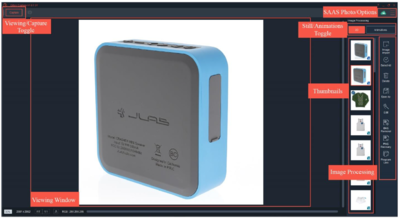
There are 2 main screens we will access when using the software. The Viewing Screen and the Capture Screen.
The Viewing Screen
This screen is displayed when the user enters the software. This is where images and animations appear after they have been captured. It also offers access to specific viewing, saving and image processing features. To take a picture, click the ‘Capture’ button - this will take you to the Capture Screen. To return to the Viewing Screen, on the Capture Screen, click the ‘View’ button.
The viewing tools in the bottom left show the total size of the image and the percentage of the image displayed in the viewing window. In addition, the image can be easily fit to screen or viewed at 1:1. There are also specific tools for selecting the background color when viewing PNG files … Finally, as the mouse moves over the image, the RGB color values of each pixel are displayed. Pure white is represented as 255, 255, 255.
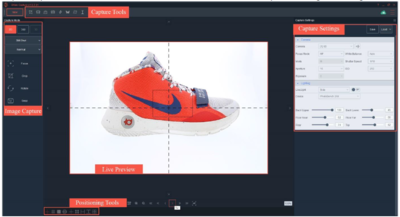
The Capture Screen
This screen contains commands related to image capture. A Live Preview is located in the center with Image Capture options for 2D a 360 on the left and Capture Settings on the right.
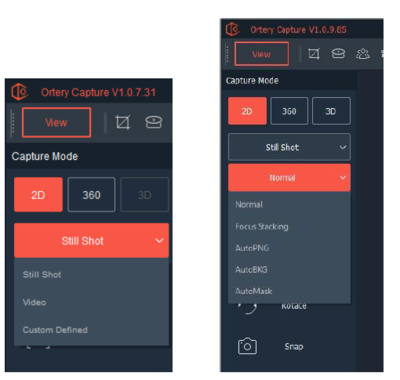
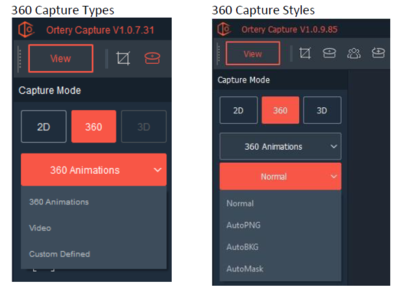
You can select either 2D or 360 here. 2D will take one picture. The 2D Capture Mode is used to take still shots. When 2D is selected as the Capture Mode, the default will be to capture Still Shots in Normal mode. However, with Ortery’s Image Capture software several capture types and styles of still shots can be taken. You can also select 360 as the Capture Mode which allows you to capture and create 360 product animations, 360 videos and Custom Defined image sequences that utilize the turntable to capture images at specific angles.
Placing and Centering the Product
To create an attractive 360 product view, the product must be placed in the center of the turntable.
Placing the Product
- Make sure that the product is clean and free of any debris. This will allow for not only a cleaner photo, but will also help with keeping the Photo table clean.
- Open up the small front door or the larger door on the right side of the photo table if the camera is already set up on the front part of the photo table.
- Place the object in the center of the table. It is important to be in the center so that the object will appear to spin in place in 360 photos instead of shifting side to side while spinning. (see below for techniques on Centering the Product.
- Close the side or front door.
Centering the Product
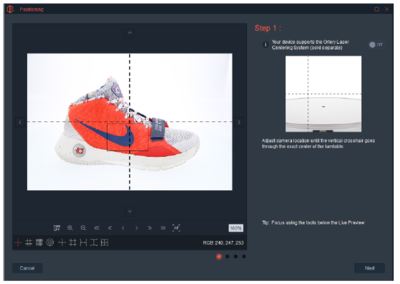
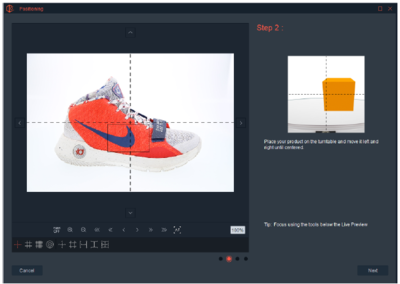
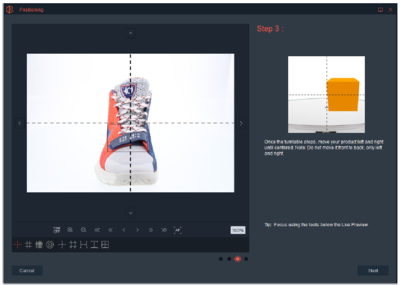
The Position Tool (page 32 of the manual)
The Position tool offers a clever series of steps that can help the user center an object on a turntable. After clicking the button, on screen directions will walk you through the process.
Overall, center your camera so the vertical cross hair inside the Preview goes through the center of the turntable. Place an object inside and center it left and right. Click next.
Now you will center your product left to right until it is centered. Once it is centered, click Next.
The turntable rotates 90 degrees. Center the object left and right again (not front and back) and in theory the product will be centered.
Taking Pictures
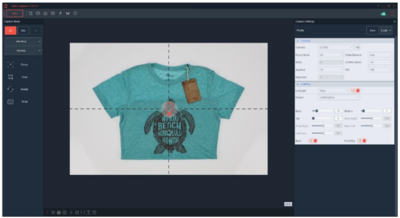
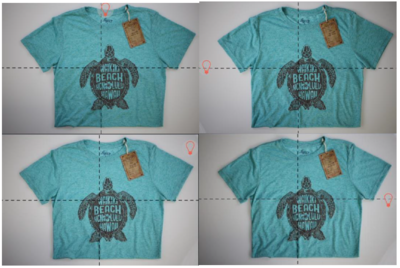
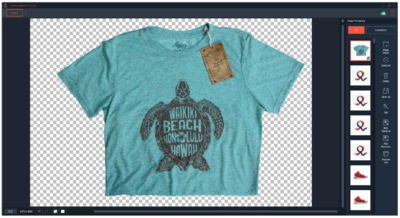
Lighting Settings (page 26 of the manual) Use the Lighting settings to control the lights of an attached Ortery studio. The Live Preview shows lighting changes in real time. Ortery LiveLight allows users to control the direction and intensity of available lighting by simply moving around on the Live Preview. Once Ortery LiveLight is turned On, an icon of a light bulb will appear on the Live Preview. The location of the LiveLight icon indicates where the light will be most intense.
In the Preview examples below, the bottom light was set to off (in AutoPNG Mode) and LiveLight icon was used moved around to quickly determine the best light settings for calling out the wrinkles / depth on the shirt.
Once the best light is determined, a picture can be taken. LiveLight brings items to life by giving them depth.
Test Shot
In 360 mode, users have the option of doing a ‘Test Shot’. Taking a Test Shot will snap one image allowing you to see the results prior to committing to the 360 capture. The screen below will appear and allow users to use the Navigator to preview RGB values in the image.
Snap
To start the animation, capture process click the Snap button. In 2D mode, Clicking Snap takes the picture. In 360 mode, clicking Snap starts the 360 image capture process. In 360 mode, the camera will take a series of pictures and rotate the table 360 degrees total. The number of pictures that are taken can be set in the capture settings on the right side. It is recommended that you start with a small number (4 or so) just to make sure that everything is set up correctly and you are happy with the centering of your product.
Saving Pictures
After the picture has been taken, you will need to save it. You have a lot of options on saving your images … JPG, PNG, GIF, and if you have 360 animation, you can save it as GIF or as HTML. Recognize that if you save it as HTML, you can view it in a web browser on a machine with access to the files, but you will need to have a web server to host the files if you want to put it on the web. However, It is generally easier to do it as an animated GIF as these are much easier to upload to things like e-mail, google docs, or google sites. The advantage to the HTML format is that not only will the picture be animated, but most viewers will allow the user to interact with the image - sliding it around.
Other Modes
2D Capture Modes (page 35 of the manual)
After making these selections, utilize the Live Preview to compose the picture. Adjust the camera and light settings as needed then click Snap to take the picture. The image will appear immediately on your monitor screen for viewing, editing and processing.
There are other modes for taking 2D pictures. Reference the manual for a more thorough discussion -but these modes include:
- Focus Stacking - Focus stacking is a special photography technique that allows the user to take several pictures over a defined focus range then combine them into a single image with a greater depth of field. It can be used to eliminate blurriness and depth of field issues. By selecting Focus Stacking, Focus Stacking Mode is turned On. For pictures taken in this mode the user will have to determine the focus range or area inside the picture to be in complete focus.
- 2D Still Shot / AutoPNG - AutoMask utilizes a new and unique way of isolating products from their background.
- 2D Still Shot / AutoMask - AutoMask utilizes a new and unique way of isolating products from their background.
- 2D - Still Shot / AutoBKG - This feature allows the user to essentially edit an image before it is taken, resulting in a JPG on pure white or a PNG file on transparent. Select 2D as the Capture Mode, Still Shot as the Capture Type and AutoBKG as the Capture Style.
360 Capture Modes and Styles (page 107 of the manual)
360 – 360 Animations – Normal. The default selection will be 360 Animations. This will allow you to create interactive 360 animations in GIF or HTML5 format. 360 Animations are created from a sequence of still images captured at different degrees as the turntable rotates, then the images are stitched together to simulate movement.
Turntable Calibration
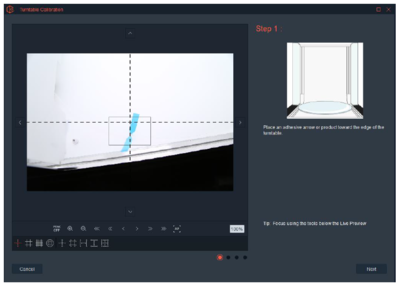
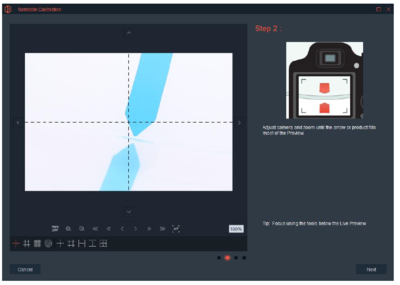
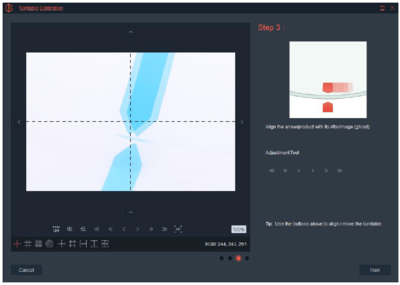
(page 104 of the manual) Before the built-in 360 turntable is run for the first time and periodically thereafter (??), the turntable will need to be calibrated for spin accuracy. The first time, the Turntable Calibration wizard will automatically appear. Afterwards click the ‘Options’ button then select “Hardware” to access the Turntable calibration feature. The turntable calibration process is documented well inside the software. You should be able to simply follow the step by step instructions as they appear on the screen.
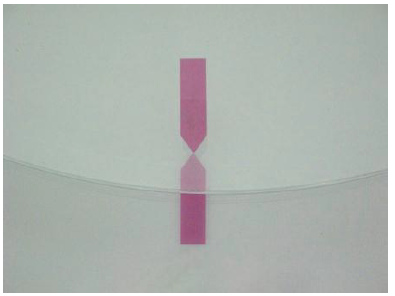
- In the first step, use the self-adhesive arrows included in the package to create a starting point. Place one arrow on the transparent turntable platform. Place the other below it. Make sure the arrows point toward each other as pictured.
- Point the camera at the arrows (which for an inexplicable reason have somehow changed to blue rather than pink, whatever). We recommend using the zoom window for increased level of accuracy. Place the black rectangle in the live preview over the arrows and click the icon to zoom 10X. Click Next. The turntable will rotate what it thinks is 360 degrees (or just shy of that - unclear).
- Use the turntable controls (Adjustment Tools) to align the actual with its AfterImage.
Once aligned, click Next again. The turntable should return to the exact same position. If it does, click “Next” and calibration is complete. If it does not, then calibrate again.
Safety
- For this machine, you want to make sure that you are treating all the equipment with respect and ensure that all things are secured before you proceed to any new step or moving around, as it is expensive.
- With the rotating table, if you have long hair, make sure that it is out of the way of the table; although it won’t kill you, it can still cause problems and cause some injuries if you’re not careful.
Certification
Troubleshooting
- Lights aren't turning on and the photo table is on - You must log into Ortery Capture before they will turn on, even if the table is powered on.
- Background looks dark/spotty - Make sure the turntable is clean and adjust the different lights and brightness.
For All Canon DSLR Cameras set:
1. "Auto power off" to Off or Disable. 2. "Auto rotate" to Off or Disable. 3. Move camera dial to M for Manual Mode. 4. Disable Continuous AF (auto focus) if applicable. 5. Make sure your Camera is in Picture Mode.
Maintenance
General maintenance
The purpose of the photo table is to take product photos on white backgrounds and as a result it is important to keep the inside of the table clean to make sure the white surfaces stay that way. This is not difficult to do. Simply wipe out the the table with a paper towel if there is anything on the table. It may be helpful to use some cleaner from the prototype lab as well.
Specific Maintenance Tasks
| Maintenance Procedure | Frequency | Done By | Last Completed |
|---|---|---|---|
| Clean out and debris from the photo table | Check after each use and perform as necessary | Student | N/A |
| Inspect lights and replace as needed | Every two months. Refer to the user manual for instructions on replacing a light | Ace |
