Difference between revisions of "PCB Printer"
Jwhipple15 (talk | contribs) |
Jwhipple15 (talk | contribs) |
||
| Line 106: | Line 106: | ||
# ''Priming the Conductor'' | # ''Priming the Conductor'' | ||
## Ensure 15 minutes have passed before beginning the next step. The dispenser should not be cold to the touch. | ## Ensure 15 minutes have passed before beginning the next step. The dispenser should not be cold to the touch. | ||
| − | ## '''Read carefully.''' The Voltera application explains this step well. Follow the on-screen instructions before moving on to the next step. Some tips/tricks/warnings: <br /><br /> - '''Nozzles are fragile!''' You would be surprised how easy it is to break one. <br /> - Hold the dispenser over a paper towel to prevent ink from getting everywhere.<br /> - If you need to wipe the nozzle, do so '''gently''' and '''use a cotton swab found in the drawers.''' <br /> - Ink should not be flowing quickly out of the dispenser when you finish priming, but '''a very small amount''' of flow is OK. <br /> [[File:Voltera priming.jpg|border|none|300x300px]] <br /> | + | ## '''Read carefully.''' The Voltera application explains this step well. Follow the on-screen instructions before moving on to the next step. Some tips/tricks/warnings: <br /><br /> - '''Nozzles are fragile!''' You would be surprised how easy it is to break one. <br /> - Hold the dispenser over a paper towel to prevent ink from getting everywhere.<br /> - If you need to wipe the nozzle, do so '''gently''' and '''use a cotton swab found in the drawers.''' <br /> - Ink should not be flowing quickly out of the dispenser when you finish priming, but '''a very small amount''' of flow is OK. <br /><br /> [[File:Voltera priming.jpg|border|none|300x300px]] <br /> |
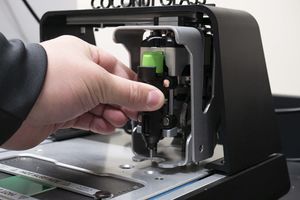
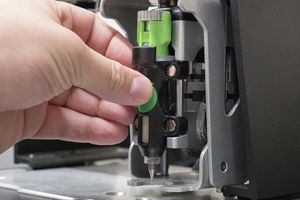
## Mount the dispenser. [[File:Voltera mount_conductive.jpg|border|none|300x300px]] <br /> | ## Mount the dispenser. [[File:Voltera mount_conductive.jpg|border|none|300x300px]] <br /> | ||
# ''Calibration'' | # ''Calibration'' | ||
Revision as of 12:39, 13 November 2018

The Voltera V-One brings quick turn PCBs to your desktop. Import your gerber file into the Voltera software, press print, and the V-One will bring your board to life. Use the solder paste dispensing and reflow features to mount components onto your printed board, or mount components on a pre-fabricated board with ease. [1]
The current Ace of this machine is Jake Whipple.
Documentation
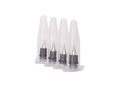
Current Inks and Paste
The following conductive inks and pastes are stocked in the PCB Lab.

Conductive Ink: AqueousSnake
- Use to lay conductive traces on substrates

Solder Paste: FuriousAnt
- Use only on boards that utilize Voltera's ink traces, such as the ink above.

Solder Paste Sn63 Pb37: ArmoredArmadillo
- Use only premade boards, such as ones from Sunstone Circuits
Terminology
Voltera utilizes many pieces of equipment. It is important to be able to distinguish them, especially when trying to explain troubleshooting issues. Here are the items you should familiarize yourself with:
Substrates
Probe
Dispenser and Sheath
Conductive Ink Cartridge
Nozzle - 225 Micron
Burnishing Pads


(Pictures to add)
Sacrificial layer
Training
Level 1

Successful completion of level 1 training will grant access to:
- Using the Voltera to create single-sided boards with NO vias or holes.
- Ready the Ink
- Reference the Current Inks and Paste for information on the what the PCB lab is currently stocked with.
- Grab the correct conductive ink from the fridge. It is labeled with a green sticker.
- Set the conductive ink on the table, allowing to begin to warm to room temperature.
- Software Setup
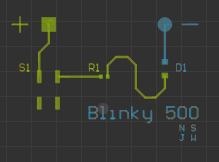
- Download the files for this project here.
- Power on the Voltera.
- Open the Voltera Windows application.
- Select "Print" and then "Simple."
- Add the proper conductive ink. This is the same conductive ink you acquired in step 1.3.
- Load the ink file from the project files. This is the Top Layer Gerber file.
- Click "Next."
- Cleaning the Sensors
- Take a cue tip and dip it into the isopropyl alcohol. The cue tip should be moist, but NOT soaked. Dab the cue tip on a paper towel to dry it slightly.
- Clean the calibration switches by rubbing them with the cue tip.
- Click "Next."
- Clamping the Substrate
- Acquire a 1.5" by 2" blank board. They are located in the one of the drawers.
- Slide the board underneath the clamps on the Voltera, push the clamps towards each other, and finger-tighten the thumb screws.
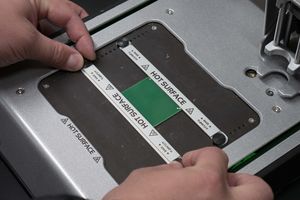
- Click "Next."
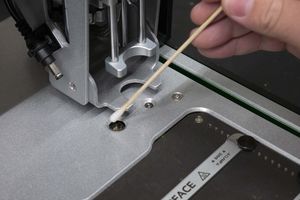
- Mounting the Probe
- Pull the probe from one of the drawers.

- Remove the cap and place it near the Voltera.
- Mount the probe onto the magnetic gantry. It should snap into place and the contacts should align.
- Click "Next."
- Pull the probe from one of the drawers.
- Positioning and Probing
- Click "Outline." This will show you where the Voltera thinks the board is. It will move the probe around the printer surface.
- Repeat step one until the outline is centered with the board. Click and drag the circuit in the Voltera application to move the outline.
- You MUST ensure the outline does not collide with the clamps AND does not exceed the dimensions of the board! Do NOT proceed until this is checked!
- Click "Next."
- Click "Probe" and wait for the Voltera to finish its measurements.
- Click "Next."
- Remove the probe, replace the cap, place the probe back in the drawer, and click "Next."
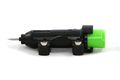
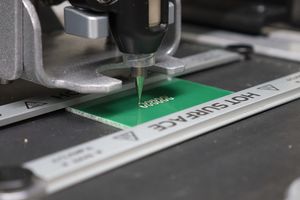
- Priming the Conductor
- Ensure 15 minutes have passed before beginning the next step. The dispenser should not be cold to the touch.
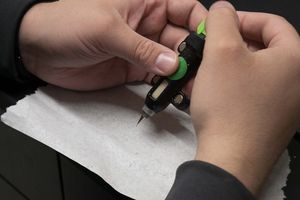
- Read carefully. The Voltera application explains this step well. Follow the on-screen instructions before moving on to the next step. Some tips/tricks/warnings:
- Nozzles are fragile! You would be surprised how easy it is to break one.
- Hold the dispenser over a paper towel to prevent ink from getting everywhere.
- If you need to wipe the nozzle, do so gently and use a cotton swab found in the drawers.
- Ink should not be flowing quickly out of the dispenser when you finish priming, but a very small amount of flow is OK.
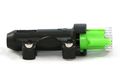
- Mount the dispenser.
- Calibration
- Click "Advanced." Start with the Z at 0.10 mm and the E at 0 um. Adjust the Voltera to these values.
- Click "Calibrate."
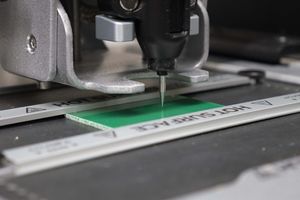
- The Voltera will lay down a test print. Pay close attention to the amount and consistency of the ink.
- The example below has slightly too much ink. Notice how a portion of the horizontal lines touch and some parts of the ink glob up.
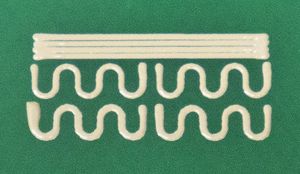
- In this case, to make an adjustment, the ink height was set to a Z of 0.09 mm and the flow was set to an E of -10 um.
- You may need to do the same or make different adjustments. Whatever you do, do NOT run the nozzle into the board! The nozzle will break!
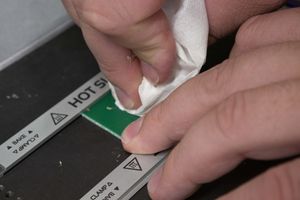
- If an adjustment was made, wipe the board clean with a paper towel (shown below) and repeat step 9.
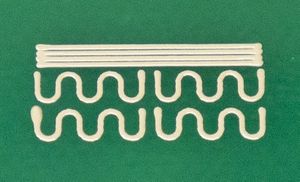
- The example below is a more acceptable test print. Strive for this consistency. If your board looks right, proceed.
- Click "Next."
- Wipe the board clean a final time.
- Click "Next."
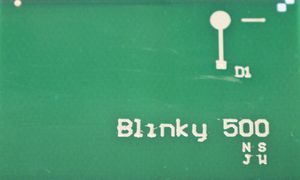
- Top Layer Print
- The Voltera will print what is selected in green. Below is an example of a portion of the board selected. Ensure the portion you want to print is selected (in this case, select everything.) Remember that blue lines will not be printed.
- Click "Start." Let the Voltera finish its process. If a portion of the print fails or is incorrect, you can stop mid-print, or wait until it is finished and redo that selection. Also shown below is an example of a portion of ink that globbed up. The portion was wiped and can be reprinted.
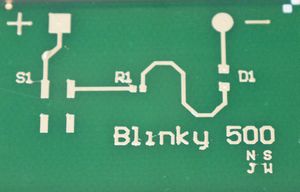
- Remove the conductor, replace the cap, and return the conductive ink to the fridge!
- When you reach the "Flip Board," you are done. Quit the Voltera application.
- The Voltera will print what is selected in green. Below is an example of a portion of the board selected. Ensure the portion you want to print is selected (in this case, select everything.) Remember that blue lines will not be printed.
- Baking the Traces
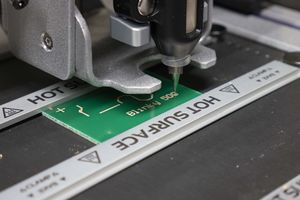
- Switch over to the Reflow Oven.

- Power the Reflow Oven on.
- Select "V1 INK."
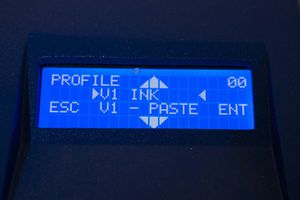
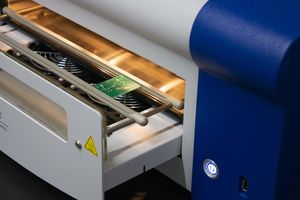
- The oven will warm up. When its ready, press "Enter" to open the tray.
- DANGER: The rails could be HOT! Take caution. Place the board securely on the rails.
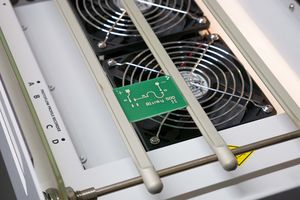
- Press "Enter" to close the tray.
- The preheat will take 2 minutes. The baking process takes about 30 min.
- Switch over to the Reflow Oven.


Level 2
CHANGE this: After completing the Hello World tutorial, you can proceed with making double-sided boards. Voltera has a tutorial called "Punk Console" which walks through creating your own double-sided board. It also shows how to use the V-One drill to make vias and component through-holes.

Usage
The Perfect Print
Two main factors affect the quality of your print.
Flow rate
Print height
Priming Conductors
Ideally, you should never have to prime the conductors. After a conductor has been primed correctly and used in the Voltera, it "closes" the dispenser. When done, you should be able to pull it off the mount and put the --- back in the fridge.
However, this is not always the case. If a student
Changing a Cartridge
- Remove the nozzle CAREFULLY
- Dissamble sheath by twisting green part clockwise
- Remove dispenser
- clean dispenser
- press downwards on the sheath to loose the cartridge
- remove the cartridge
- proceed to chuck the cartridge in the nearest garbage can
- wind the dispenser clockwise until it cant clockwise anymore
- acquire new cartridge
- remove top and bottom green caps SAVE THEM
- insert the cartidge with the label facing the back, in other words, the label should not be viewable through the window on the sheath
- insert the dispenser and lock it in by twisting the green part counter clockwise
- carefully REPLACE NOZZLE, use fingers first and then pliers!44