Difference between revisions of "Mood Lamp"
| (13 intermediate revisions by the same user not shown) | |||
| Line 22: | Line 22: | ||
== Bill of Materials == | == Bill of Materials == | ||
| + | [https://docs.google.com/spreadsheets/d/15U8mSvatrKNHKqPu6eNVy3LgCc526ikXjzVWxL_AvPo/edit#gid=0| Parts List ] | ||
== Create the wooden "heels" and "slices" == | == Create the wooden "heels" and "slices" == | ||
| Line 106: | Line 107: | ||
=== Route the shelf === | === Route the shelf === | ||
| − | Perform the pocket cut 1/8" deep. This requires the initial pocket cut over the entire region, followed by an inside cut to clean up the pocket cut. The system automatically stays slightly off of the line during the pocket cut as the edge is not as clean when large amounts of wood are being removed. Hence, the inside cut to clean. | + | Perform the pocket cut 1/8" deep. This requires the initial pocket cut over the entire region, followed by an inside cut to clean up the pocket cut. The system automatically stays slightly off of the line during the pocket cut as the edge is not as clean when large amounts of wood are being removed. Hence, the inside cut to clean. You will want to offset the cut slightly (1/16"? - need to verify again) to make the insertion of the faceplate easier. |
=== Route the hole === | === Route the hole === | ||
| Line 190: | Line 191: | ||
* 4 Legs | * 4 Legs | ||
* 1 Table | * 1 Table | ||
| − | * | + | * 3 Extension cylinders |
[[Image:TV_Mood_Lamp_LED_legs.png|x300px]] | [[Image:TV_Mood_Lamp_LED_legs.png|x300px]] | ||
| Line 205: | Line 206: | ||
== Electronics == | == Electronics == | ||
| − | Our | + | The electronics are all about controlling the red, green, and blue intensities on an RGB LED strip - likely in some sort of fade pattern. Our specific RGB Led strip lights are rated at 12V, therefore, we will use a 12V transformer as an input. We will use an [https://www.arduino.cc/ Arduino] microcontroller. Specifically, the stalwart [https://store.arduino.cc/usa/arduino-uno-rev3 | Arduino UNO Rev3]. We need to add three power transistors to the Arduino to be able to deliver adequate power to the red, green, and blue LEDs of the led strip. Therefore, we will use the [https://www.adafruit.com/product/196 | Proto-Screw Shield] from [https://www.adafruit.com/ | Adafruit]. |
| + | Our system will be driving 12V led strips directly from the power transformer input. You should not use a transformer significantly different than 12V. The circuit is shown below as a [https://fritzing.org/home/ fritzing] breadboard diagram (click it to enlarge). You can also download an easier to read [[Media:TV_Mood_Lamp_fritzing.pdf|pdf]] or the original [[Media:TV_Mood_Lamp_fritzing.fzz|fritzing file]]. | ||
| − | + | === Assemble the Proto-Screw Shield === | |
| − | + | Assembly of the shield is straightforward. Directions are given at the [https://learn.adafruit.com/adafruit-proto-screw-shield/intro Adafruit site]. There is no need to connect the LED's and resistors on the proto-shield. We will not be using them, and they will not be visible within our lamp. So, all you really need to assemble are the screw terminals (and the reset buttons is fine as well - doesn't hurt anything to have it, but it is sort of hard to press inside of the lamp). | |
| − | + | [[Image:TV_Mood_Lamp_fritzing_circuit.png|x500px]] | |
| − | + | === Solder together the screw shield circuit === | |
| − | + | You will want to use solid-core wire for the point-to-point connections on the board. These will hold their position, and fit easily through the holes in the protoboard. To connect to the screw terminals, use the stranded wire. It is much more flexible and will greatly reduce the risk that you break a wire when inserting or removing the system. | |
| − | |||
| − | |||
| + | ==== Components ==== | ||
| − | + | ==== Input wires (stranded wires) ==== | |
| + | The Input wires connect the external components to the screw terminals. The input power jack connects from the center terminal (power) to one end of the power switch. The other end of the power switch connects to the VIN of the Arduino system. The ground of the power jack must be connected to the GND of the Arduino system. The potentiometers should have their "low-side" tied together and then connected to the Arduino GND. They should also have their "high-side" tied together and then connected to the Arduino 5V regulated power. The wiper of each potentiometer should then be connected to A0 and A1 respectively. If hooked up "correctly," when the potentiometer is all the way "on," the wiper should be connected to the "high" side. Now, what constitutes "on" is left up to you. If these are hooked up incorrectly, then the wiper can be inverted in software as a simple fix. | ||
| − | + | ==== Output wires (solid-core wires) ==== | |
| + | The output system serves to drive the LED lights and consists of the internal wires on the shield. These lights will be connected to a 4-pin terminal in the center of your board. This terminal has power (white or black wire) and then wires for green, red, and blue signals. The power comes directly from the VIN pin ('''not''' the 5V pin). Each of the green, red, and blue signals is connected to a "low-side" MOSFET switch. The source of the MOSFET's are connected to GND, the drain is connected to the appropriate pin on the 4-pin header, and the gates are connected to pins 3 (green), 10 (red), and 11 (blue). | ||
| + | When soldering solid core wires onto prototype boards, you generally want to connect them to a component that is also soldered into the board. The easiest way to do this is to put the wire through a hole adjacent to the component lead, and then bend the wire over horizontally so that it is basically touching the lead. To accomplish this you will need to strip the wire a little longer to allow enough wire for the journey. Journey? Sure ... journey. | ||
| − | === | + | === Testing the shield wiring === |
| − | + | '''BEFORE''' powering anything up, or connecting the shield to the Arduino, use a multimeter to validate that the circuit has been wired properly. Test every connection for continuity. It is also good to check nearby pins to ensure that there are no shorts. After testing every connection, plug the board into the Arduino, and turn the power on. Ensure that the Arduino is getting power (the power led comes on). Use the DMM to test the voltages around the system. Make sure that the power wire at the LED Strip terminal is getting the same voltage that is coming out of the power supply. Make sure that the potentiometers are getting 5V. If all of this is correct, you can proceed. Turn off the power, and remove the shield from the Arduino. | |
| − | |||
| − | |||
| − | |||
| − | |||
| − | |||
| − | === | + | === Programming the Arduino === |
| − | + | There are a lot of resources on the web about how to Arduino. Let's start with the official Arduino Guide page for the [https://www.arduino.cc/en/Guide/ArduinoUno Arduino UNO]. If you are using your own system, install the Arduino IDE. If you are on a school system, bring up the Arduino IDE. You will need to make sure that your Arduino is connected via USB to the computer. | |
| + | * When you are ready, scroll down the Arduino Guide page to the "Open your first sketch" section and attempt to get your Arduino to blink. | ||
| + | When this works, it is time to move on and test the proto-shield. '''POWER DOWN THE SYSTEM BY UNPLUGGING THE POWER'''. Insert the proto-shield to the Arduino. Then power the system back up. You should see the "blink" program working. The last program you wrote will always run automatically when the system is reset. | ||
| + | * Open up the AnalogInput Example and use it to test one of your potentiometers. You will need to understand the code to know what you are looking for - but a quick google on the aspects of the code that you don't understand should get you there. | ||
| + | * Change the code to test your other potentiometer. | ||
| + | At this point we should test the LED lights (make sure they are plugged in). Prior to the setup function in your code, add in the following lines:<pre> | ||
| + | #define REDPIN (10) | ||
| + | #define GREENPIN (3) | ||
| + | #define BLUEPIN (11)</pre> | ||
| + | And then, in your setup, add in the following:<pre> | ||
| + | pinMode(REDPIN, OUTPUT); | ||
| + | pinMode(GREENPIN, OUTPUT); | ||
| + | pinMode(BLUEPIN, OUTPUT); | ||
| + | analogWrite(REDPIN, 255); | ||
| + | analogWrite(GREENPIN, 255); | ||
| + | analogWrite(BLUEPIN, 255);</pre> | ||
| + | When you run this code, it should turn the LED's all on, which will make a bright white light. Cool. | ||
| − | + | Finally, when all appears to be working, download the [[Media:Mood_Light_Fader_Code.zip|fader code]] and test it. You should have a functioning system now! Congratulations. | |
Latest revision as of 22:48, 15 January 2024
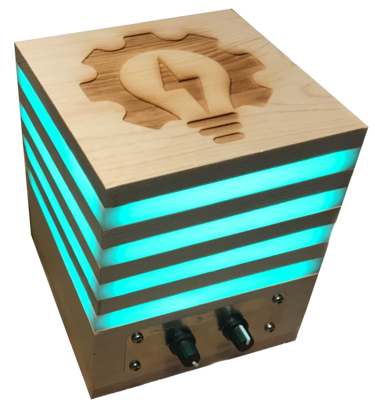
In this TV, we will create a mood lamp. The lamp consists of an internal ...
Bill of Materials
Create the wooden "heels" and "slices"
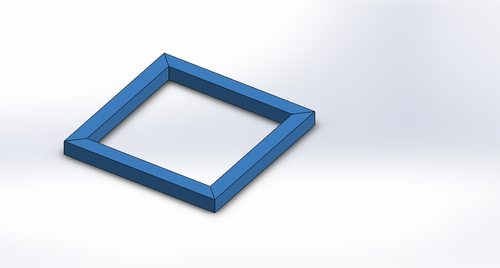
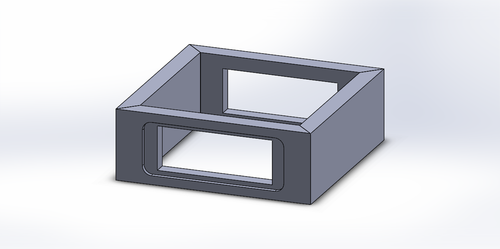
I thought about calling this project the "light loaf" due to the terminology of heels and slices. The heels are the pieces that go on each end of the mood lamp. These are 5.5" square. The slices are made up of 4 mitered 1/2"x5.5" pieces glued together. You will need to create 2 heels and 3 slices. Additionally, you will need to create a base "slice" that will house the controls. This is made up of 4 mitered 2"x5.5" pieces.
Plane the board
You will begin with a 4'x8" board. As everything in the project is based on 1/2" pieces, you will need to initially plane the entire board down to 1/2" thickness
Cut the board
When planning on how to cut your board, you will want to make sure that the grain of the wood runs horizontally along the slices, allowing for maximum strength. One possible way to lay out your wood is given in the picture below. Always remember that you must allow for the kerf of the saw blade. On the table saw, this is generally 1/8".
For this scenario, you might want to do the following:
- Cut a 12" piece off of one end of the board. Rip this to 5.5", then cut 2 5.5" pieces from the remnant.
- Rip a 2" piece off of the length of the board.
- Rip 2 (or 3) 1/2" pieces off of the length of the board.
- Take these pieces that have been ripped, and then cut them into 5.5" strips.
- Miter each of these pieces.
Assemble the slices
- Assemble the 1/2" strips into 3 squares. Glue them up and clamp them in the Angle Strap Clamps.
Introduce yourself to Solidworks
Go to the Solidworks Training page and complete the recommended tutorials. This could take a couple of hours. As a demonstration that you understand the tutorial, design a slice in Solidworks. You can do this by designing the 1/2"x1/2"x5.5" mitered piece, then creating an assembly out of 4 of these. Call these mitered_slice_piece.SLDPRT and mitered_slice.SLDASM.
Assemble the base slice
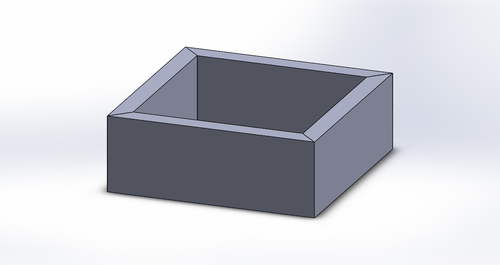
Before assembling the base slice, we will need to cut holes for the controls, as well as an inset so that we can inlay aluminum control plates. Two of the base sides will be unaffected, but two will have the same hole/inset pattern. When the holes and inlays have been cut, the base can be glued and clamped just as the slices were above.
Design the slice in Solidworks
- Make a copy of the slice you designed. Copy both the assembly and the slice (technically, we only need the part file for the router, but we will go ahead and make the assembly so that we have a model of our entire system). Let's call these new files mitered_base_piece.SLDPRT and mitered_base.SLDASM. In the assembly, replace the old part with the new one. In the new part, change the height from .5" to 2".
- You will need to make another copy of the mitered_base_piece.SLDPRT. Let's call this mitered_base_piece_with_hole.SLDPRT.
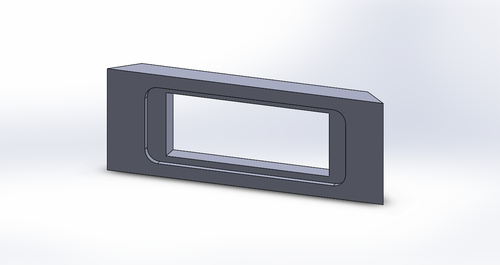
- In this piece, add a rectangle hole in the center, 3.25" wide by 1.25" tall.
- Outside of this, add an inset that is 4" wide by 1.5" tall. This inset should be 1/8" deep. Make sure that the inset is on the outside (the long end) of your mitered part.
- Add a fillet to the inset that has a radius of 1/4".
- Replace a pair of opposite base pieces with the new base piece with hole. This should be your final base.
Prepare the design file for the router
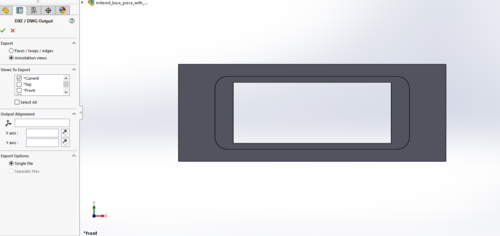
- You will need to export the DXF of your single mitered_base_piece_with_hole.SLDPRT (not the assembly). Open up this file, and set the view so that you are looking at the front of the design (looking through the hole).
- Save this file as a DXF (Save As, then select the DXF format). If a window pops up asking you for a desired options to save the file, select the first one. The DXF window asks you which view to export. If you are already looking at the appropriate view (and you should be), select the "*Current" option and click the check to export the file. This will show you a render of your 2D DXF design. Click save.
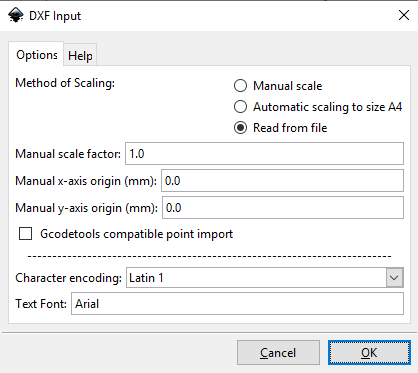
- The router does not use DXF files, but it wants an SVG. So, open Inkscape and import this DXF file. If you are not familiar with Inkscape, this would be a good time to do the training on the Inkscape Training page. On the import, make sure that you have the "Method of Scaling" set to "Read from file".
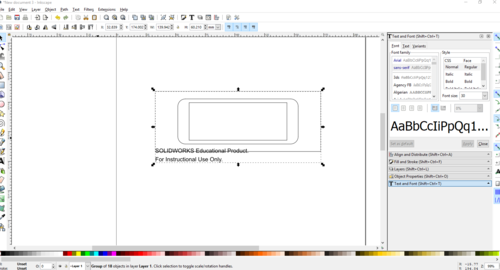
- When you bring the file up in Inkscape, you will see that Solidworks has added some text to the drawing. Delete this text.
- Things look OK at this point, but they are not. You can test this by trying to fill one of the sections with a color. You will quickly find out that these lines are not joined together. There is a thorough explanation of how to fix this given here:
In short, you will need to select each set of lines that should be connected, then use the "Edit Paths by Nodes" tool to select the two nodes that occupy the same spots, and then join the selected nodes. This will tie the line segments together to create a distinct shape in Inkscape. You need to do this to turn all of the lines into shapes that can be colored. This will allow the CNC Router to recognize the shapes.
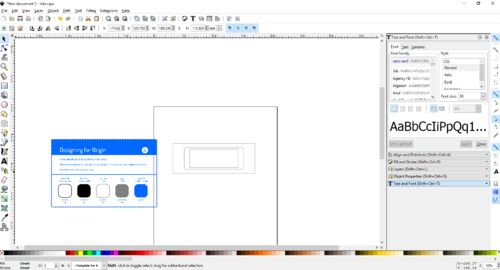
- We can choose to color code the design for the router. This isn't strictly necessary, as it can be done on the router. In fact, for something this simple, it will be just as easy to do this on the router. If you did want to color code it here, you could download the Shaper_Origin_Template.svg file and import it into your design. Move it off to the side. We will just be using it for color reference. Then color the different sections accordingly.
- Save the svg of the design. This is what will be loaded by thy router.If you have an account on the Shaper Hub, then load your file there. To get an account, set it up on the router itself. There is presently (7/15/2019) not a way to add an account from a computer. If you do not have or cannot get an account, copy your file to a USB drive. This can be uploaded directly into the device.
Set up the work piece for the Handheld CNC Router
The Handheld CNC Router expects that it is viewing and routing on a solid surface in one plane. However, we have already cut out our mitered pieces. So, you will need to set up a 1/2" board with tape, and using some double-sided tape or other fastening mechanism, mount the piece to be routed at the bottom of the taped board. Be sure to place the outside of the part upward, so that you route the inset into the proper side. It is also a good idea to stick or mount some 1/2" blocks on either side to give the router a solid base when it is routing your part.
Set up the Handheld CNC Router
- Follow the directions given in the Handheld CNC Router Training to set up the router. We will want to use the 1/4" bit for this operation.
- Mark the interior rectangle as an "interior cut." This will tell the router to cut inside of this line. Mark the middle rounded rectangle as a pocketing cut. This will tell the router to take out everything within this area (this will give us the inset). Mark the outside rectangle as a "guide." The router will not route here, but this should map onto the outline of your piece.
Route the shelf
Perform the pocket cut 1/8" deep. This requires the initial pocket cut over the entire region, followed by an inside cut to clean up the pocket cut. The system automatically stays slightly off of the line during the pocket cut as the edge is not as clean when large amounts of wood are being removed. Hence, the inside cut to clean. You will want to offset the cut slightly (1/16"? - need to verify again) to make the insertion of the faceplate easier.
Route the hole
Perform the inside cut another 1/8" deep. The perform it again, another 1/4" deep. This should get through the entire 1/2" of the board.
Assemble the base
When both pieces have been routed, glue up and clamp your base as you did the slices.
Create the Acrylic Slices
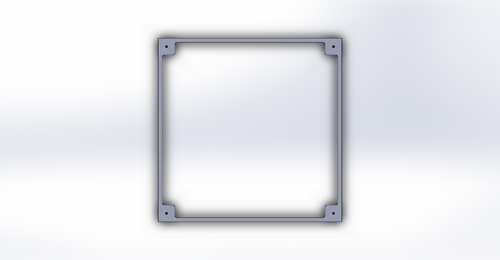
Unlike the wooden pieces, the acrylic slices will be one solid piece. These slices are the same 5.5" square, but they look different on the inside. Each corner is a 1/2" square piece. This leave 4.5" in between them. This 4.5" span is connected by a 1/8" wide piece. Where the 1/8" wall joins the 1/2" corner, there is a 1/16" radius fillet. By thinning this piece, we will allow more light through the acrylic walls. We will also want to add a small 1/16" diameter hole in the center of each square. This will be used to help us center our drill when we add in the insets for the magnets.
Design the acrylic slice in Solidworks
There are likely many ways to do this. I have found the easiest is to make a simple 5.5" square, and then use lines to describe the cut pattern inside. To add the holes, add 1/32 wide radius (1/16 diameter) circles in the center of the square (dimension the center 1/4" away from each edge), and then use Linear Sketch Pattern to create the other 3 holes (or just do the hole 4 times).
Prepare the Omax Waterjet Software
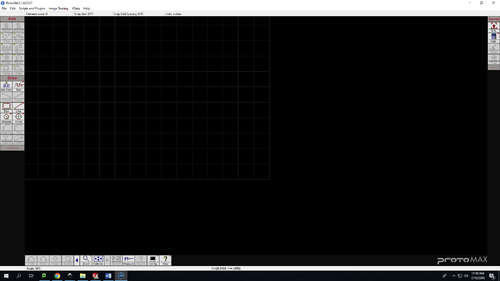
Bring up the ProtoMAX Layout software.
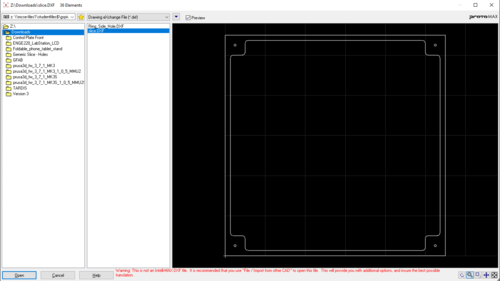
In Solidworks, save your file as a DXF file. Open up this filein ProtoMAX. If you get a warning about this isn't an Intellimax file - ignore it. Feel good about yourself. You are beyond the system.
Cut the slices on the Waterjet
Create the control panels
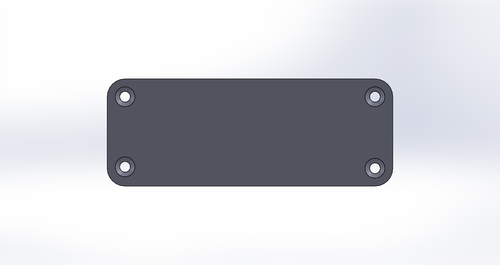
The control panels are 4" wide and 1.5" high. They have 1/4" radius fillets at each corner. Inset 1/4" from each edge are 4 holes designed for #6 machine screws and have a diameter of .15". This means that the basic shape for both control plates looks like this:
Use Solidworks to design the front control panel
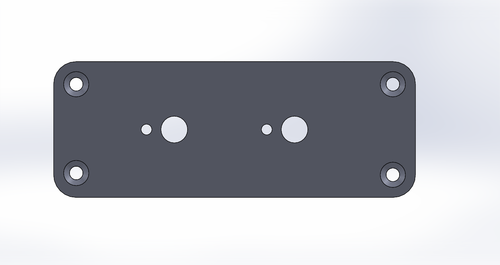
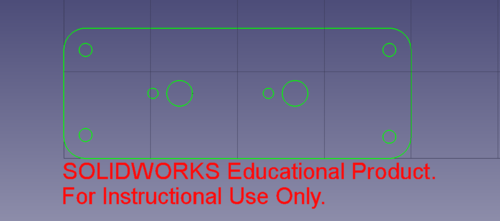
The front control panel houses the two potentiometer knobs. See the datasheet for a description of the panel layout. The potentiometer holes should be centered vertically on the panel and equally distributed horizontally. If you choose to not design the plate yourself, a Solidworks model is given here: Mood_Lamp_Front_Control_Plate.SLDPRT. It should look like this when completed.
Use Solidworks to design the rear control panel
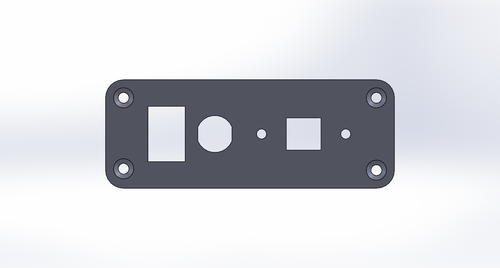
The front control panel houses the power switch ( datasheet), powerjack ( datasheet), and USB port. These should all be centered vertically, but distributed aesthetically in the horizontal direction. The USB cable was purchased from | Amazon. The screw holes are 3.5mm diameter and the centers are 29.6 mm apart. In the middle is a 12.2mm square cutout for the USB plug. If you choose to not design the plate yourself, a Solidworks model is given here: Mood_Lamp_Rear_Control_Plate.SLDPRT. It should look like this when completed.
Prepare the job control file for the Metal Laser Cutter
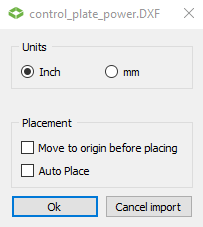
The Metal Laser Cutter uses the FabCreator software to create the job control file. You will need the DXF files for the control panels. When you save them, delete the countersink circles as we don't want these cut on the laser cutter. You can also do this in FabCreator, but it is simple to do it here. When your DXF files are ready, you should Open up FabCreator, and import the DXF file that you want to create. Set the units according (inches in our case), and leave the placement boxes unchecked.
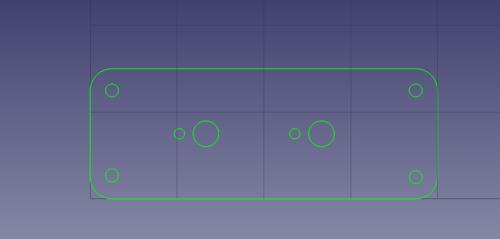
This should bring in the control panel.
Select the text and delete it.
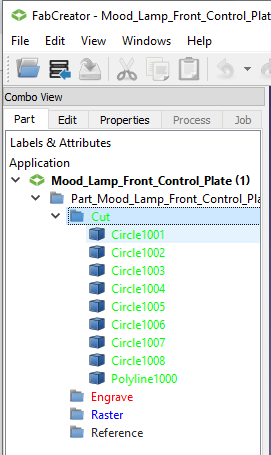
Notice that the lines are all green - this represents cut lines, which is what we want. However, we want to make sure that the cuts go in the proper order. Specifically, you want to make sure that the outside line is cut last so that the part doesn't move. It would also be nice if the cuts occurred in a logical order, just to make things more efficient as the head travels. The order of the cuts is based on the list in the Part window. Simply move the elements around to ensure that the list reflects, from top to bottom, the order in which you want the cuts.
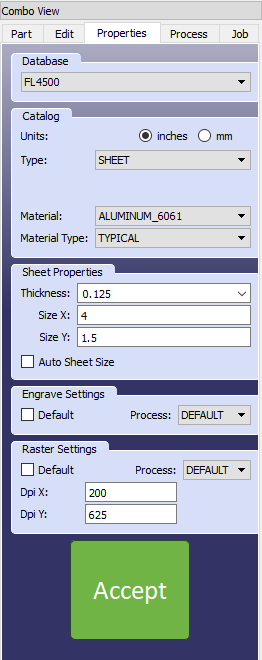
Click on the Properties tab. Set the Database to FL4500 (this is our machine). Set the thickness to 1/8" (.125). Change the Y size to 1.5 (I don't know that this matters, I just like to see the square match).
Click on the job tab. You can look at the job preview by clicking the "Show Job preview" button. It isn't very exciting. It should be the same outline. When you are satisfied (and you should be very satisfied), click the Make and Save button. This will save a .fab file that you will put on USB to transfer to the laser cutter.
Etch the Logo on the top
Download the Maker_Hub_Logo_Transparent.svg. Load this file in Inkscape. You will want to prepare this file for etching in the laser cutter. To etch, the colors need to be set to black. Change the fill color of the logo components to black. There should not be a stroke on these components. When completed, save the file. At this point, you can follow the instructions on the Speedy_300 training section - specifically starting after the design has been completed. (This is currently step 8, but mileage may vary as time goes on).
3D Print the LED stand
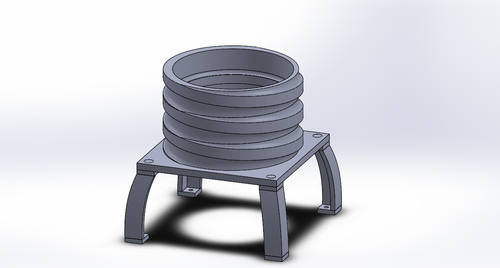
The LED stand provides a platform for the LED lights. It will be 3D printed.
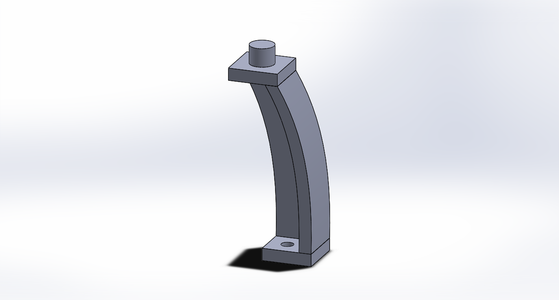
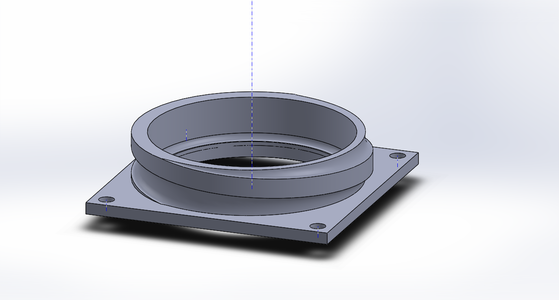
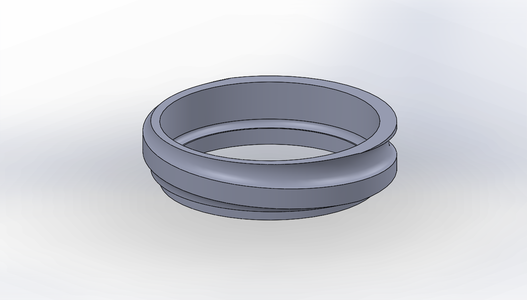
The stand is made up from 3 parts:
- 4 Legs
- 1 Table
- 3 Extension cylinders
The files for the LED stand are included in Mood_Lamp_LED_stand.zip. There are STL's provided for each of the required parts (legs/plate/cylinder).
With these STL's, follow the directions for whichever 3D printer you will use for these parts.
Attach the magnets
Each slice (including the base), will have 8 magnets attached to it (4 on top, 4 on bottom). These magnets are 1/4" diameter x 1/16" deep. Each slice will therefore need a hole drilled 1/16" deep in the center of each corner. The acrylic slices have marks already. It is important that the wood holes line up exactly. Make sure you do not drill all of the way through. It will be very difficult to mount the magnets if the hole does not have a bottom.
Electronics
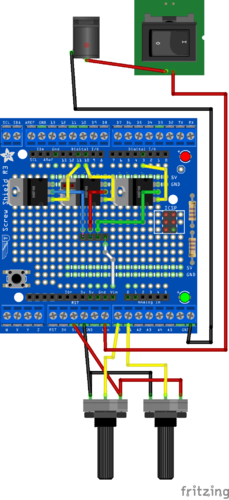
The electronics are all about controlling the red, green, and blue intensities on an RGB LED strip - likely in some sort of fade pattern. Our specific RGB Led strip lights are rated at 12V, therefore, we will use a 12V transformer as an input. We will use an Arduino microcontroller. Specifically, the stalwart | Arduino UNO Rev3. We need to add three power transistors to the Arduino to be able to deliver adequate power to the red, green, and blue LEDs of the led strip. Therefore, we will use the | Proto-Screw Shield from | Adafruit. Our system will be driving 12V led strips directly from the power transformer input. You should not use a transformer significantly different than 12V. The circuit is shown below as a fritzing breadboard diagram (click it to enlarge). You can also download an easier to read pdf or the original fritzing file.
Assemble the Proto-Screw Shield
Assembly of the shield is straightforward. Directions are given at the Adafruit site. There is no need to connect the LED's and resistors on the proto-shield. We will not be using them, and they will not be visible within our lamp. So, all you really need to assemble are the screw terminals (and the reset buttons is fine as well - doesn't hurt anything to have it, but it is sort of hard to press inside of the lamp).
Solder together the screw shield circuit
You will want to use solid-core wire for the point-to-point connections on the board. These will hold their position, and fit easily through the holes in the protoboard. To connect to the screw terminals, use the stranded wire. It is much more flexible and will greatly reduce the risk that you break a wire when inserting or removing the system.
Components
Input wires (stranded wires)
The Input wires connect the external components to the screw terminals. The input power jack connects from the center terminal (power) to one end of the power switch. The other end of the power switch connects to the VIN of the Arduino system. The ground of the power jack must be connected to the GND of the Arduino system. The potentiometers should have their "low-side" tied together and then connected to the Arduino GND. They should also have their "high-side" tied together and then connected to the Arduino 5V regulated power. The wiper of each potentiometer should then be connected to A0 and A1 respectively. If hooked up "correctly," when the potentiometer is all the way "on," the wiper should be connected to the "high" side. Now, what constitutes "on" is left up to you. If these are hooked up incorrectly, then the wiper can be inverted in software as a simple fix.
Output wires (solid-core wires)
The output system serves to drive the LED lights and consists of the internal wires on the shield. These lights will be connected to a 4-pin terminal in the center of your board. This terminal has power (white or black wire) and then wires for green, red, and blue signals. The power comes directly from the VIN pin (not the 5V pin). Each of the green, red, and blue signals is connected to a "low-side" MOSFET switch. The source of the MOSFET's are connected to GND, the drain is connected to the appropriate pin on the 4-pin header, and the gates are connected to pins 3 (green), 10 (red), and 11 (blue).
When soldering solid core wires onto prototype boards, you generally want to connect them to a component that is also soldered into the board. The easiest way to do this is to put the wire through a hole adjacent to the component lead, and then bend the wire over horizontally so that it is basically touching the lead. To accomplish this you will need to strip the wire a little longer to allow enough wire for the journey. Journey? Sure ... journey.
Testing the shield wiring
BEFORE powering anything up, or connecting the shield to the Arduino, use a multimeter to validate that the circuit has been wired properly. Test every connection for continuity. It is also good to check nearby pins to ensure that there are no shorts. After testing every connection, plug the board into the Arduino, and turn the power on. Ensure that the Arduino is getting power (the power led comes on). Use the DMM to test the voltages around the system. Make sure that the power wire at the LED Strip terminal is getting the same voltage that is coming out of the power supply. Make sure that the potentiometers are getting 5V. If all of this is correct, you can proceed. Turn off the power, and remove the shield from the Arduino.
Programming the Arduino
There are a lot of resources on the web about how to Arduino. Let's start with the official Arduino Guide page for the Arduino UNO. If you are using your own system, install the Arduino IDE. If you are on a school system, bring up the Arduino IDE. You will need to make sure that your Arduino is connected via USB to the computer.
- When you are ready, scroll down the Arduino Guide page to the "Open your first sketch" section and attempt to get your Arduino to blink.
When this works, it is time to move on and test the proto-shield. POWER DOWN THE SYSTEM BY UNPLUGGING THE POWER. Insert the proto-shield to the Arduino. Then power the system back up. You should see the "blink" program working. The last program you wrote will always run automatically when the system is reset.
- Open up the AnalogInput Example and use it to test one of your potentiometers. You will need to understand the code to know what you are looking for - but a quick google on the aspects of the code that you don't understand should get you there.
- Change the code to test your other potentiometer.
At this point we should test the LED lights (make sure they are plugged in). Prior to the setup function in your code, add in the following lines:
#define REDPIN (10)
#define GREENPIN (3)
#define BLUEPIN (11)
And then, in your setup, add in the following:
  pinMode(REDPIN, OUTPUT);
  pinMode(GREENPIN, OUTPUT);
  pinMode(BLUEPIN, OUTPUT);
  analogWrite(REDPIN, 255);
  analogWrite(GREENPIN, 255);
  analogWrite(BLUEPIN, 255);
When you run this code, it should turn the LED's all on, which will make a bright white light. Cool.
Finally, when all appears to be working, download the fader code and test it. You should have a functioning system now! Congratulations.
