Leatherworking Station

Make: Various
Model: Various
Serial Number: Various
Ace: Dane Ziegler (dziegler22@georgefox.edu).
Location: The Vault
Description
The Leatherworking Station
Documentation
Terminology
Awl
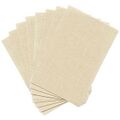
Burnishing Cloth
Dobbers
Leather Dye
Edge Beveler
End Punch
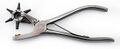
Hole Punch Set

Manual Leather Sewing Machine
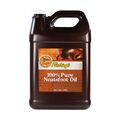
100% Pure Neatsfoot Oil
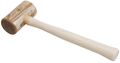
Rawhide Hammer
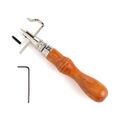
Revolving Punch

Rivet Setter
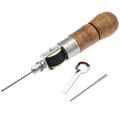
Sewing Awl
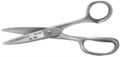
Leather Shears
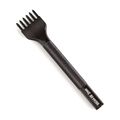
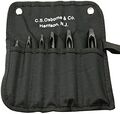
Stitching Chisel
Stitching Groover
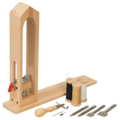
Stitching Pony
Strap Cutter
Swivel Knife


Vegetable-tanned Leather is tanned with natural vegetable tannins to alter the protein structure of the hide, causing it to become leather. This type of leather typically takes a longer amount of time to create. Approximately 10% of all leather is vegetable-tanned.
Chrome-tanned Leather uses chemicals to tan and is a faster, less costly process. Chrome-tanned leather comes in a large variety of colors and is often less stiff than untreated vegetable-tanned leather. Approximately 90% of all leather is chrome-tanned. Do not laser cut chrome-tanned leather.
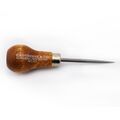
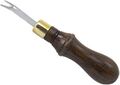
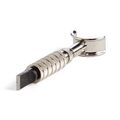
Awl - An awl is a tool with a metal point used for marking, piercing, punching, or sewing leather.
Burnishing Cloth - A canvas-like material that will burnish (to seal, smooth, and make shiny through rubbing friction) the edges of your leather workpiece. These can also remove char after using a laser engraver.
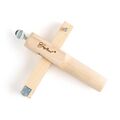
Wood Burnisher - A wooden piece with grooves that is used to smooth and harden the edges of leather through applied friction and pressure.
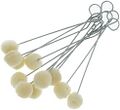
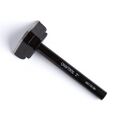
Dobbers - Dobbers are used to apply oil or dye to your leather workpiece.
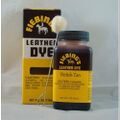
Leather Dye - Leather dye will stain your vegetable-tanned leather. We have a variety of colors available.
Edge Beveler - An edge beveler is a tool with a metal blade that is used to remove the square corners from the edges of leather goods.
End Punch - An end punch is used to cut smooth and clean tips on belts and straps up to 2" wide.
Hole Punch Set and Revolving Punch - Leather punches are hole punches specifically for making holes of various sizes in leather. They are great for setting rivets or making holes in belts and collars.
Manual Leather Sewing Machine - A heavy duty, hand-cranked sewing machine. Please receive proper training on threading and operation before using.
Neatsfoot Oil - Neatsfoot oil is an oil finish for leather that comes from the shin bones and feet of cattle. It's used to soften, condition, and preserve leather products.
Rawhide Hammer - A rawhide hammer (also called a leather maul) is a striking tool used for stamping, tooling, setting rivets, and more.
Rivet Setter - A set of tools used for setting rivets in leather.
Leather Shears - Heavy duty scissors that cut through leather quite easily.
Stitching Chisel - Stitching chisels are tools that are used for marking and creating holes in leather--usually for hand-sewing purposes. They are built with equally spaced metal points.
Stitching Groover - A tool that marks a groove around the edge of your workpiece by applying downward pressure as you drag the tool. The guide can be adjusted for different depths of inset grooves.
Stitching Pony - A device that keeps leather securely in place while hand-sewing, stitching, or lacing.
Strap Cutter - A tool designed to cut leather strips up to 4" wide as the leather is pushed/pulled across a small blade.
Swivel Knife - A swivel knife is used to outline and cut a design into the surface of leather as an initial stage to tooling the leather with decorations.
Training
Operation
The
Demonstration
The demonstration for the leatherworking station will be an overview of the tools and techniques. Take a piece of scrap leather and perform the following actions:
- Take the strap cutter and cut a 0.5" strip of leather
- Practice punching a couple holes with either the rotary punch or the hole punch set
- Set the stitching groover to run a groove around the edges of your leather strip
- Use the edge beveler to round the top and bottom edges
- Burnish the edges of your leather strip with the wood burnisher, the burnishing cloth, or the burnishing attachment for the Dremel tool
- Prepare the leather for some hand-sewing by puncturing it with an awl or a stitching chisel
- Secure your leather strip in the stitching pony and-sew a few of the stitching holes you made
There are many more skills associated with leatherworking; this demonstration is only designed to cover the basics.
General Procedure
Keep in mind that a little leather dye goes a long way; start with super light and thin coats. Avoid drenching your leather workpiece in the dye as this can produce some unwanted results (like your blue dye turning copper-colored).
Safety
- You must wear safety glasses when performing any type of hammering at the leatherworking station. Anyone else within a 6-foot radius of you should put on safety glasses too.
- Apply leather dyes in the finishing room to minimize breathing their vapors.
- Remember that there are many sharp and pointy tools at the leatherworking station that are specifically designed to cut and puncture cow skin. If it can cut/puncture cow skin, it can certainly cut/puncture your skin. Treat the tools with respect, and exercise good judgment when cutting and puncturing to keep yourself out of the tool's path.
Certification
Troubleshooting
Maintenance
General maintenance
Insert text
Specific Maintenance Tasks
| Maintenance Procedure | Frequency | Done By |
|---|---|---|
| Sample | Sample | Sample |