Difference between revisions of "Hand Bender"
Ddemaree17 (talk | contribs) |
Ddemaree17 (talk | contribs) |
||
| Line 58: | Line 58: | ||
====Demonstration==== | ====Demonstration==== | ||
| − | + | To demonstrate competency on the hand bender you will be required to make a s hook. | |
====General Procedure==== | ====General Procedure==== | ||
Revision as of 17:53, 20 May 2020
Make: Di-Acro
Model: Model 2 Bender (02HB)
Ace: Needed (Makerhub@georgefox.edu).
Location: Machine Shop
Description
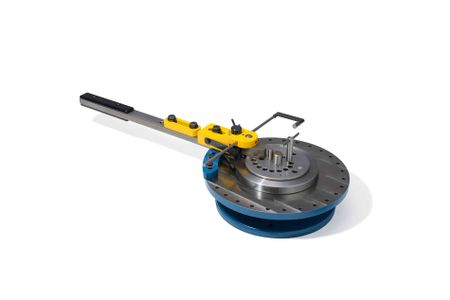
A hand bender is a machine used to bend wire, solid stock, and tubing. The bender comes with multiple dyes for different types of bends.
*Currently the bender stand is not bolted to the floor, so you can really only bend light materials like 1/8" thick aluminum. If you want to bend thicker material, you will need help from someone to hold the table. In the future we will be bolting the bender to a sturdier spot.
Here is an example of bending a piece of rod:
Here is an example of bending a piece flat bar:
Documentation
Terminology
Insert terminology here
Training
Overview
Read/skim the "Art of Bending" document to find out how to set up the equipment. Then Watch the "Simple Bend" video to see how the equipment functions.
Demonstration
To demonstrate competency on the hand bender you will be required to make a s hook.
General Procedure
1) Gather all necessary supplies: 0.25" round mild steel stock, ruler, sharpie, hacksaw, 1/2" R die, radius pin, 3/4" wrench.
2) Cut a piece of 0.25" round mild steel stock 6" long using a hacksaw. (A hacksaw should be used instead of the horizontal band-saw because the diameter of the material being cut is small enough that only one-two teeth on the band-saw blade will contact the material at a given time. The likelihood of damaging the saw blade or having the stock become caught in the blade increases anytime less than three teeth are in contact with the cut stock.)
3) Using a ruler and sharpie, mark the middle point and make a mark 1/8" from each end respectively.
4) Insert the 1/2" R die into the center hole and place the radius pin in the 2nd closest hole.
5) to be continued.... :)
Safety
- Keep all hands and fingers out of any pinch points.
- Be aware of your surroundings before swinging the bending handle.
Certification
Troubleshooting
This is a very basic piece of equipment so very little trouble shooting should be required. See the "Art of Bending" document for machine setup.
Maintenance
General maintenance
Tech will lubricate zerk fitting as needed.
Specific Maintenance Tasks
| Maintenance Procedure | Frequency | Done By |
|---|---|---|
| Sample | Sample | Sample |
