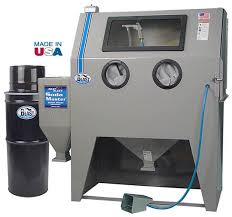
Blast Cabinet
Jump to navigation
Jump to search
The 960-DLX DELUXE Skat Blast Cabinet has become one of "America's Favorites". TWO 90 watt floodlights and big 12" x 33" window for improved, brighter visibility when blasting. Plus, Skat Blast's C-35-M Foot-Pedal-Operated Power Gun and pickup tube system for a more powerful, even blast. Quiet Vac-50 HEPA Vacuum with HEPA Filtration collects 99.97% dust particles down to 0.3 microns.
The current Ace of the Blast Cabinet is Levi Gibson (lgibson19@georgefox.edu).
Documentation:
This video shows a good example of using the blast cabinet.
Procedures: Blast stencil pattern on acrylic scrap
- Tape existing stencil to acrylic scrap
- Open the cabinet door.
- Place stencil/acrylic to sandblast into the cabinet
- After placing parts in the cabinet, make sure secure the door with latch properly
- Turn on the cabinet light and fan. Switch is located on the top left of the machine
- Locate the power switch and turn on the sandblaster
- Insert your arms into the gloves and position yourself to have a clear view into the cabinet
- Picking up the parts and gun, manually aim where the stencil doesn't cover the acrylic
- Position your foot in the foot pedal mechanism. Once pedal is depressed sand will blast out of the gun
- When finished, turn the machine off
- Before removing parts, wait 5-10 mins for the dust in the cabinet to settle
- Once you remove parts make sure to close cabinet door and power off the light and fan
Warnings:
- Make sure the cabinet door is closed before stepping on the air activation pedal.
- Keep the activation pedal clear when loading the cabinet.
- After you are done using the blaster let the dust in the cabinet settle prior to opening the door.
- Inhaling the dust produced by the cabinet is bad for your lungs.
- Never point the nozzle towards your hand or the window in the cabinet.

